There are various useful Mac Terminal commands within the Unix operating system that you can use to improve your workflow. As a Mac user, you should take advantage of the several tips and tricks that are available to you when working with Terminal.
In this article, we’ll provide you with valuable information on how you can open, execute, and use commands in Mac Terminal with ease and without any problems. You’ll also learn about the best Terminal replacement, Commander One.
What is a Terminal on Mac
Terminal on Mac is Apple’s command line interface application. It’s essentially an application that gives you access to the inner workings of a Mac. You can use it to make changes to the operating system which you otherwise can’t from the graphical user interface (GUI).
Mac’s Command Line Interface (CLI) isn’t meant to be used by a casual user. That’s why its interface isn’t very user-friendly and can be hard to understand, especially if you don’t have any technical knowledge.
Terminal is rooted in Unix, the core operating system on which both Mac and Linux are built. The latter has a similar command line tool that lets you execute various commands.
Learning how to run Terminal in the Apple operating system is a straightforward process and we’ve explained it below.
How to open Terminal on macOS
Before you begin to write commands in Terminal Mac, you need to know how to open the app first. There are several ways to access Terminal. Which method you should use depends on your requirements and personal preferences.
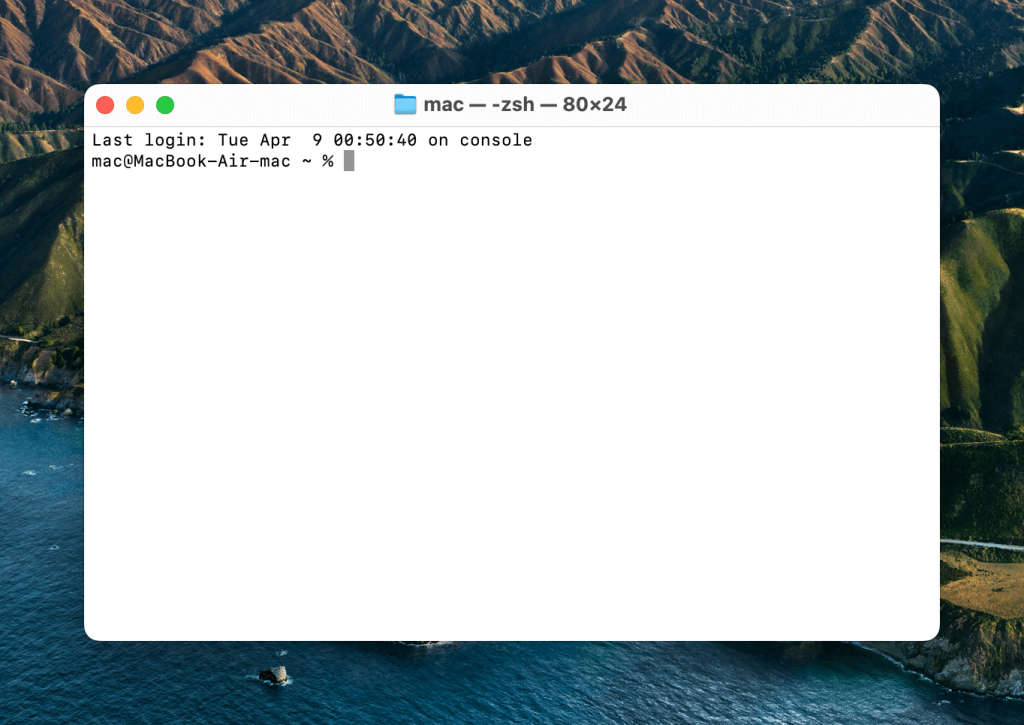
Here are some of the most common ways to open Terminal on macOS:
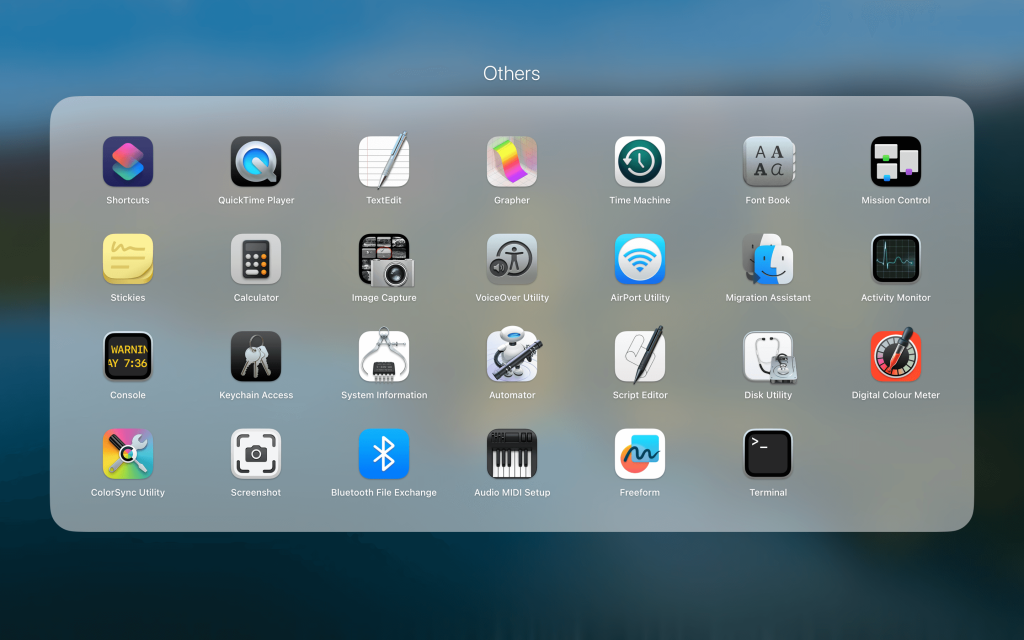
1. How to open Command Line on Mac via the Dock
The Dock panel usually has a shortcut which takes you to all your applications. In more recent versions of macOS, this shortcut is called “Launchpad.” In the list of applications, find and open the “Utilities” folder and you’ll find the Terminal app inside it. Double-click on it to open it.
Note that on some versions of macOS, the Terminal app would be located in the “Other” folder, which you can find after opening Launchpad.
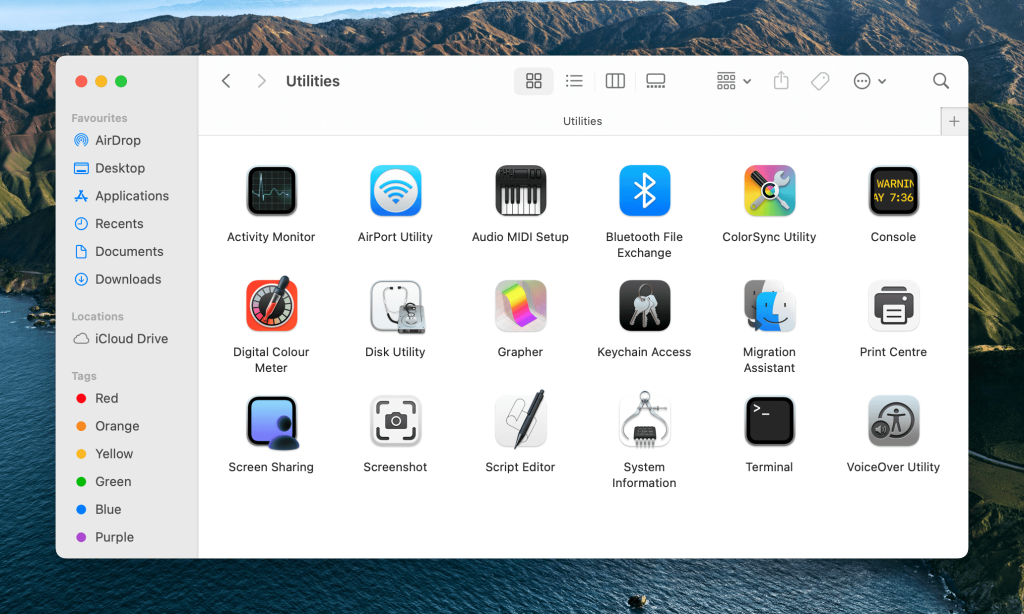
2. Opening Terminal through Finder
Open the Finder app (it’s always on the extreme left in the Dock). Click on Applications in the sidebar. In the list of programs that open, find the “Utilities” folder and double-click on it. Now search for the Terminal app and double-click on it to open it.
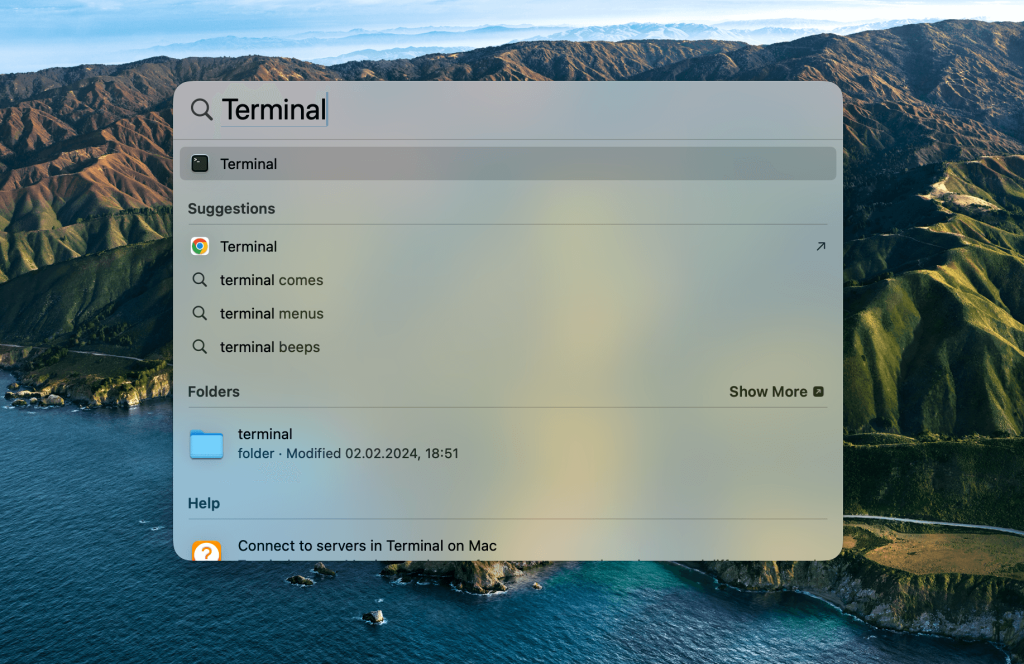
3. Opening Terminal on Mac through Spotlight search bar
To open the Spotlight search bar, press the Command + Space bar keys simultaneously. In the small window that pops up, enter the word “Terminal.” After typing, the Mac console for commands will come up automatically. Click on it to open it.
4. Basic Terminal Mac shortcuts
- Command (⌘) + T is used in order to open a new terminal window.
- Command (⌘) + N is used in order to open a new tab in the terminal.
- Command (⌘) + Shift + T is used to switch between multiple tabs.
How to run a command on Mac?
The command line begins with the name of the computer, followed by the name of the current directory – by default, the user’s home directory opens, which is denoted by ~ (tilde) on Unix systems.
This is followed by the username followed by the $ sign – an invitation to run commands on Mac. All commands are entered after the $ sign and are written in bash language. Now that you know how to use Terminal on Mac, you’re ready to start executing commands!
Terminal Tricks to Know
There are tons of things the macOS Terminal can do. From moving a large number of files to changing preferences that we couldn’t even imagine. To demonstrate what Terminal can do, we have put together 14 excellent tips and tricks that you might find useful. Here are some of the most common Terminal codes for Mac:
1. Enable showing hidden files and folders
If you want to see all the folders and files hidden by the system, then run the following command in the Terminal:
defaults write com.apple.finder AppleShowAllFiles -bool TRUE && killall finder
Tip: To hide them back, change the value from TRUE to FALSE.
2. View the contents of any files
If you have a damaged file or you think that there’s something hidden inside it, then you can force Terminal to open it, despite other applications failing to do so. Here’s the command you need to use:
cat ~/path/to/file
Just keep in mind that if you try to open a photo or any other non-text document, you’ll see a wall of illegible characters.
3. Copy the contents of a folder from one location to another
Of course, you can just copy-paste the entire contents of the folder, but in cases where you need to simplify and / or automate this process, the following Mac Terminal command will help you:
ditto -V ~/source/folder/ ~/new/folder/
4. Changing the file format of screenshots
While using Terminal on Mac, you can change the format of screenshots from PNG to any other, including PDF and JPG:
defaults write com.apple.screencapture type jpg && killall SystemUIServer
5. Disable shadows in screenshots
If you tend to take a lot of screenshots and don’t want any extra effects on them, you can use Terminal to turn off the drop shadow effect, leaving only the window itself in the screenshot. Here’s the command for it:
defaults write com.apple.screencapture disable-shadow -bool TRUE && killall SystemUIServer
6. New names for screenshots
Not happy with the boring and inconvenient “Screenshot date-time” naming format? Here’s a command that you can use to replace the word “Screenshot” with something better:
defaults write com.apple.screencapture name "New name" && killall SystemUIServer
If you want to revert the settings and get the original naming format back, use the following command:
defaults delete com.apple.screencapture name && killall SystemUIServer
7. New folder for screenshots
By default, all screenshots are saved to your desktop, clogging up valuable space. To change this, simply enter the following command from the list of Useful Terminal commands:
defaults write com.apple.screencapture location ~/your/location/here && killall SystemUIServer
8. How long has my Mac been on?
Can’t remember how long it has been since you rebooted your computer? You can check this using the following command in the Terminal:
uptime
9. Disable sleep mode
Sometimes it becomes necessary to keep your Mac awake, like when you’re creating a backup. While using Mac Terminal, you can disable hibernation on your Mac by typing:
caffeinate
Now your Mac won’t fall asleep no matter what happens.
Tip: You can specify the time (in seconds) after which your Mac will automatically go to sleep if it’s inactive. Here’s how you can input the command along with specified time in the command prompt:
caffeinate -u -t 5400
10. Start auto-restart when the Mac completely freezes
While Mac computers are generally reliable, sometimes they tend to freeze for no reason at all and a forced reboot is the only solution. The following command forces the OS to reboot if it notices that the system isn’t responding:
sudo systemsetup -setrestartfreeze on
11. Drag and drop folders and files to automatically generate paths
One trick that saves the most time and makes using Terminal easier is automatically generating paths. Working in the Terminal, you need to enter custom file paths often. First, you have to locate the file or folder, then copy the file path into the Terminal. It can take a long time, and it’s easy to make typos.
Instead, you can grab a file or folder and drag and drop it directly into the Terminal window. This trick even works mid-command, so whenever you need a file or folder path, just grab the icon and generate it automatically when you drop it into Terminal.
12. Activate the type to talk feature
While automatically generating paths saves you a significant amount of time when you’re working, the type-to-talk command primarily exists for entertainment purposes. When you type the say command, your Mac will repeat anything you type afterwards.
Your Mac has over 100 voices you can choose from. By adding a name to the command say -v name you can change the voice it uses to repeat the text you enter into Terminal. There are two ways to get the list of the names:
- Use the
say -v ?command to get a list of the voice names. - Navigate to the Accessibility menu in System Preferences:
- Select Speech in the left-hand menu list;
- Open the System Voice drop-down menu;
- Select Customize;
- Browse the voice options available and pick the ones you like the most.
Keep in mind that while the say command recognizes periods and commas, you have to type everything into a single line because the Return key executes any command you type. We recommend typing longer paragraphs of speech in a text document first, and then copying and pasting them into Terminal.
13. Repeat characters by holding down a single key
Those who use both Windows and macOS will notice slight differences in the keyboard functions of each operating system. It can take some time to adapt to the different keystroke responses of a Mac. One of the most noticeable differences is when you press and hold a single key.
On macOS, holding down a single key reveals a number of variations of that character. In Windows, that same shortcut allows you to repeat that character for as long as you hold down the key.
Both are useful functions, but it’s only possible to repeat the spacebar key in macOS by holding it down in a text field. If you find you’re not using alternative characters very often (keep in mind you can always copy/paste them from Wikipedia as well), then you can permanently switch the function for Mac.
Open Terminal and type the following, and press Return to execute:
defaults write NSGlobalDomain ApplePressAndHoldEnabled -bool FALSE
Quit any open applications and restart them for the change to take effect. If you change your mind later and want to go back to the alternate characters, you can enter the same command with TRUE instead of FALSE:
defaults write NSGlobalDomain ApplePressAndHoldEnabled -bool TRUE
Remember to hit the Return key to execute the command once you have it entered.
14. Customize a Login Window Message
Whether you’re using your Mac for productivity or entertainment , it’s a great feeling when you customize it to make it a bit more personal. Using Terminal, you can create your own message for the login window of your Mac and this customization can be extended across multiple systems, whether at work or an educational setting. The command line is:
sudo defaults write /Library/Preferences/com.apple.loginwindow LoginwindowText "Your message here"
Make sure you log out of your account or restart your Mac to start seeing the greeting message when you log back in. This message will then appear every single time you log into your computer. If you want to change the message seasonally or remove it altogether, just use the command below:
sudo defaults delete /Library/Preferences/com.apple.loginwindow LoginwindowText
Using Terminal tricks is one way to get more computer savvy, have fun with the native features of macOS, and customize your computer according to your preferences. Here’s a cheat sheet that lists some of the most commonly used Terminal commands and shortcuts.
Mac Terminal Commands List to improve productivity
Here are some important Mac command line commands that you can use to improve your productivity and make your workflow smoother:
Shortcuts
To save time, you can take advantage of keyboard shortcuts while using Mac Terminal. These shortcuts will help you navigate Terminal faster and more easily. Here are some of the most commonly used shortcuts:
| Command | Action |
Tab |
Use auto-completion for file and folder names |
Ctrl + A |
Return to the start of the current line |
Ctrl + E |
Skip to the end of the current line |
Ctrl + U |
Delete the current line ahead of the cursor |
Ctrl + K |
Delete the current line behind the cursor |
Ctrl + W |
Clear the last word before the cursor |
Ctrl + T |
Exchange the two characters before the cursor |
Esc + T |
Exchange the two words before the cursor |
Ctrl + L |
Clear the entire screen |
Ctrl + C |
Stop what is currently running |
Ctrl + D |
Exit from the active shell |
Option + → |
Skip the cursor one word forward |
Option + ← |
Skip the cursor one word backward |
Ctrl + F |
Skip the cursor one character forward |
Ctrl + B |
Skip the cursor one character backward |
Ctrl + Y |
Paste cut text |
Ctrl + Z |
Suspend whatever is running in the background |
Ctrl + _ |
Undo your last command |
Option + Shift + Cmd + C |
Copy selected text |
Shift + Cmd + V |
Paste the copied selection |
Basics
The basic Mac Terminal commands allow you to perform some basic management operations, such as creating new files and viewing their contents. Here are some of these commands:
| Command | Action |
/ |
Root directory |
. |
Current working directory |
.. |
Parent of the current working directory |
~ |
Home folder for the logged-in user |
sudo [command] |
Run current command using super user security privileges |
nano [file] |
Open the Terminal editor |
open [file] |
Open a specified file |
[command] -h |
Open help for a specific command |
man [command] |
Access the help manual for a specific command |
exit |
End your current shell session |
Change Directory
There are various commands you can use to copy, move, delete directories, and perform other similar actions. Here are some of them:
| Command | Action |
cd |
Navigate from one directory to another |
cd [folder] |
Change the directory to a new specified folder |
cd ~ |
Navigate to home directory of logged-in user |
cd / |
Navigate to the root directory |
cd - |
Navigate to the last directory you opened |
pwd |
Show the current working directory |
cd .. |
Navigate up to the parent of the current directory |
cd ../.. |
Navigate up two parent directors from the current |
cp -r [directory] [destination-path] |
To copy directories |
mv [directory] [destination-path] |
To move directories |
rm -r [directory] |
To delete directories |
List Directory Contents
You can view the contents of a directory in the form of a list using the following command:
ls
There are plenty of things you can do with the ls command. For example:
| Command | Action |
ls |
Show all file and subdirectory names in the current directory |
ls -C |
Show listing in forced multi-column |
ls -a |
List all entries including . and .. directories |
ls -1 |
Show file list in single-entry per line format |
ls -F |
Organize output with a slash / after directory paths, asterisk * after programs and scripts, at @ after symbolic links |
ls -S |
Organize files and entries by size |
ls -l |
Long-form list with: file owner, group name, mode, date, time, pathnames and more |
ls -l / |
Symbolic link list of the file system from the root |
ls -lt |
Files listed by time, with most recently modified first |
ls -lh |
Long-form list organized by human-readable file size in KB, MB or GB |
ls -lo |
List organized by file names with file size, owner, and any flags |
ls -la |
Detailed list of a directory contents including any hidden files |
File Size and Disk Space
There are some Terminal commands that will show you the size of files and how much space they take up on your Mac. Here are some of them:
| Command | Action |
du |
List showing the usage of every subdirectory and its contents |
df -h |
Display your system free disk space |
df -H |
Display your system free disk space in powers of 1,000 instead of 1,024 |
du -sh [folder] |
Display a human-readable output of a directory files |
du -s |
List entries for specific files |
du -sk * | sort -nr |
Display all files and folders with total size including subfolders in KB; use sm instead of sk to get directory size in MB |
du -k |
To view the size of file in kilobytes |
To view the size in megabytes and gigabytes, replace the -k with -m and -g, respectively.
File and Directory Management
File and directory management commands will assist you in working with directories in the Terminal. For example, you can use the pwd command to see the name of the current working directory.
| Command | Action |
mkdir <dir> |
Generate a new folder with name <dir> |
mkdir -p <dir>/<dir |
Generate nested folders |
mkdir <dir1> <dir2> <dir3> |
Make several folders at once, without nesting |
mkdir "<dir>" |
Generate a folder with a space in the file name |
rmdir <dir> |
Delete an empty folder; doesn’t work for folders with contents |
rm -R <dir> |
Delete both a folder and its contents |
touch <file> |
Generate new file without specifying an extension |
cp <file> <dir> |
Duplicate a file to a specified folder |
cp <file> <newfile> |
Duplicate a file to the current folder in use |
cp <file> ~/<dir>/<newfile> |
Duplicate and rename a file to a specified folder |
cp -R <dir> "<new dir>" |
Duplicate a folder to a new, specified folder when there are spaces in the filename |
cp -i <file> <dir> |
Provide a warning prompt before copying a file regarding overwrite |
cp <file1> <file2> <file3> /Users/<dir> |
Duplicate multiple files to a single folder |
cp [path-to-file] [destination-path] |
To copy a file to a directory |
ditto -V [folder path] [new folder] |
Duplicate a folder contents to a new specified folder V prints a line status for all the copied files |
rm <file> |
Delete permanently a file: be cautious when using this command |
rm -i <file> |
Ask for confirmation before deleting a file |
rm -f <file> |
Remove forcibly a files without needing confirmation |
rm <file1> <file2> <file3> |
Delete several files at once without needing confirmation |
mv <file> <newfilename> |
Move a file location and rename it |
mv <file> <dir> |
Relocate a file to a new folder; allows possible overwrite of existing files |
mv -i <file> <dir> |
Add an optional -i flag warning before file overwrites |
mv *.png ~/<dir> |
Relocate files with PNG extension from current folder to a new one |
Note that if the file doesn’t exist, your Mac will automatically create it for you.
Command History
Can’t remember the last command you executed? Don’t worry, the Mac Terminal lets you see a history of all the commands you’ve executed with the following command:
history
| Command | Action |
Ctrl + R |
Perform a search in prior commands |
history n |
Display prior typed commands; add a value to n to limit the displayed items |
![value] |
Execute last typed common that begins with a value |
!! |
Execute whatever command was typed last |
Permissions
Permissions commands allow you to see and change permissions for specific files and directories, which is important if you want to maintain the security of your data. You can use these commands to change the ownership of files.
| Command | Action |
ls -ld |
Show a home directory default permissions |
ls -ld <dir> |
Show a folder permissions for read, write and access |
chmod 755 <file> |
Revise a file permission to 755 |
chmod -R 600 <dir> |
Revise both a folder and its contents permission to 600 |
chown <user>:<group> <file> |
Change a file ownership to a new user and group; the addition of -R will include the folder contents in the change |
chmod [number] [filename] |
To change the read and write permissions for a file |
The [number] field is a three-digit number that indicates owner, group, and everyone else’s permissions.
Read is represented by the number 4, write by the number 2, and execute by the number 1. To give no permission, you have to write the number 0.
Each digit in the [number] field is calculated by adding up the values for the specific permissions. Take the following command for example:
chmod 600 [filename]
This command will give the owner read (4) and write (2) permissions, but no execute (0) permissions (4+2+0=6). The group and everyone else will have no permission since the second and third digits are both 0.
Processes
As the name indicates, the processes commands help you understand what processes are currently running and perform some other useful operations. There are three main commands: view, find, and quit.
| Command | Action |
ps -ax |
Display currently running processes; a display processes from all users; x display processes disconnected with the Terminal |
ps -aux |
Display processes with %cpu, %mem, page in, PID and command |
top |
Show relevant live information about running processes |
top -ocpu -s 5 |
Get an update every 5 seconds of processes sorted by CPU usage |
top -o rsize |
Display a list of processes sorted by memory usage |
kill PID |
Quit all processes with the ID PID; view PID as a column in the Activity Monitor |
ps -ax | grep <appname> |
Locate processes by name or PID |
Network
There are several network commands you can use on your Mac. Here are some of the most basic ones:
| Command | Action |
ping <host> |
Ping the display status and host |
whois <domain> |
Show the whois for a specified domain |
curl -O <url/to/file> |
Download a selected file with HTTP, HTTPS or FTP |
ssh <username>@<host> |
Create a SSH connection from a specified host with a user designated with username |
scp <file> <user>@<host>:/remote/path |
Copy a specified file to a remote host |
arp -a |
Display a list of your local network devices with IP and MAC addresses |
ifconfig en0 |
Display your own device IP and MAC address |
traceroute [hostname] |
See the path and hops when packets traverse from your device to a designated address |
Homebrew
Homebrew is a package manager on macOS. In essence, it installs, updates, and manages software packages on your computer. Here are some of the most common Homebrew commands for Mac Terminal:
| Command | Action |
brew doctor |
Review the homebrew for potential issues |
brew help |
Display a list of useful formula and cask commands for homebrew |
brew install <formula>|<cask> |
Install a homebrew formula or cask |
brew uninstall <formula>|<cask> |
Uninstall a homebrew formula or cask |
brew list --formula |
Display a list of the installed formula and nothing else |
brew list --cask |
Display a list of the installed cask and nothing else |
brew deps <formula>|<cask> |
Display a list of a formula or cask dependencies |
brew search text|/regex/ |
Use regex to search for formula or cask |
brew upgrade <formula>|<cask> |
Perform upgrades for the specified formula or cask |
brew outdated <formula>|<cask> |
Perform a search for out-of-date formula or cask |
brew outdated --formula |
Perform a search for an outdated formula alone |
brew outdated --cask |
Perform a search for an outdated cask alone |
brew pin [installed_formula] |
Add a pin to a formula to prevent an upgrade |
brew unpin [installed_formula] |
Unpin formula to upgrade a package |
brew cleanup |
Remove stale lock files and outdated packages for all formula and cask |
Environment Variable or Path
Environment variables refer to information such as the current user’s home directory, the username of the current logged-in user, the language of the computer, and more, type:
| Command | Action |
printenv |
Show a list of the environment variables currently set and which are in current use |
echo "Hello" |
Specify something for the terminal to print and display |
echo $PATH |
Evaluate a PATH variable value that storing a list of directories and executables files |
echo $PATH >path.txt |
Export the current PATH directory to a text file |
export PATH=$PATH:absolute/path to/program/ |
Restrict a program execution via terminal to your current session for regularly used programs; add the PATH to the shell configuration |
Search
Search commands help you locate specific files and contents within directories. Use the following commands:
| Command | Action |
find <dir> -name "<file>" |
Locate all specified files by name <file> within a certain directory <dir>; use * to search for parts of filenames |
grep "<text>" <file> |
Display an output of every occurrence of specified <text> within a certain <file>; use -i to ignore case sensitivity |
grep -rl "<text>" <dir> |
Locate any files containing specified <text> within a certain <dir> |
Output
A forwarding output command lets you take the output of one command and extend it to the second command where it’s used as an input. Here’s how you write it in the macOS Terminal:
| Command | Action |
cat <file> |
Output all content of a specified <file> |
less <file> |
Use the less command to support pagination and other features when outputting contents of a specified <file> |
head <file> |
Output only the first ten lines of a specified <file> |
<cmd> >> <file> |
Add the output of a specified <cmd> to the <file> |
<cmd> > <file> |
Specify the output of <cmd> into a certain <file> |
<cmd1> | <cmd2> |
Specify the output from <cmd1> to <cmd2> |
The list shared here isn’t exhaustive and there are many more Terminal commands that you can use to give your productivity a boost. You can see the full list of these commands in a .pdf format here.
How to Exit Terminal on Mac?
You can close Terminal after you’re done experimenting with the various commands we’ve shared above. Find Terminal in the Mac menu bar. Click it and choose Quit Terminal from the menu.
Alternatively, you can press the Command + Q keys together.
Commander One - great Terminal emulator for Mac
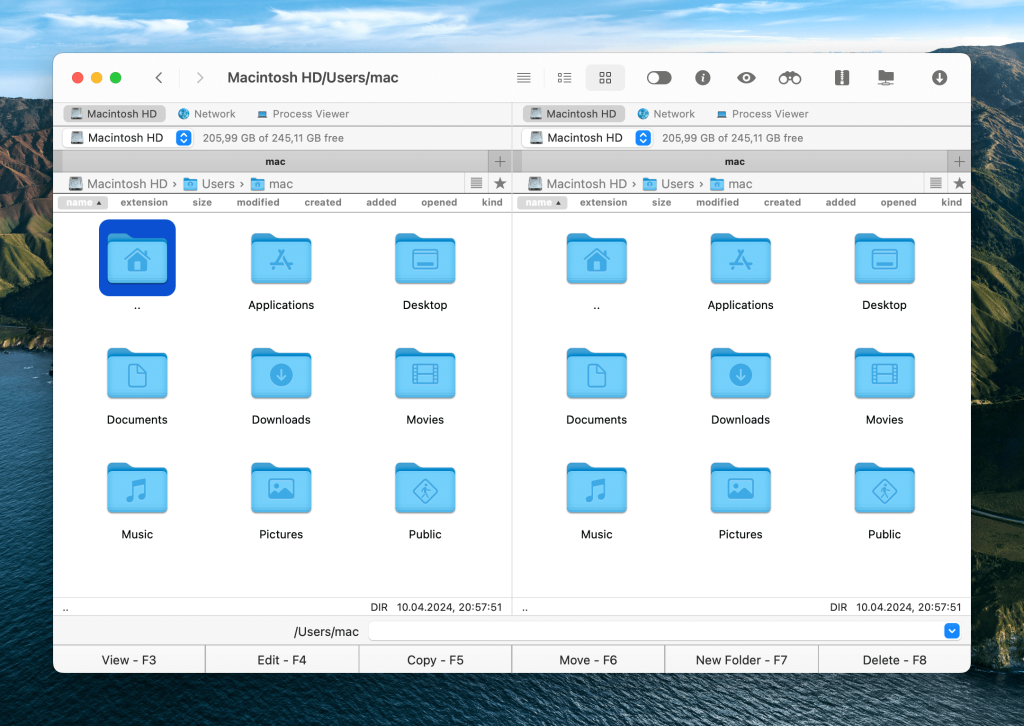
This FTP Terminal is perfect for those who want to keep everything under control and within reach. Commander One isn’t just a decent Terminal emulator app for Mac, but also a highly functional file manager.
To execute Terminal commands, Mac users simply need to type them in the dedicated window in Commander One or invoke Terminal within it by pressing the keys Ctrl + O simultaneously. After that, just follow the Mac Terminal commands cheat sheet we’ve shared above.
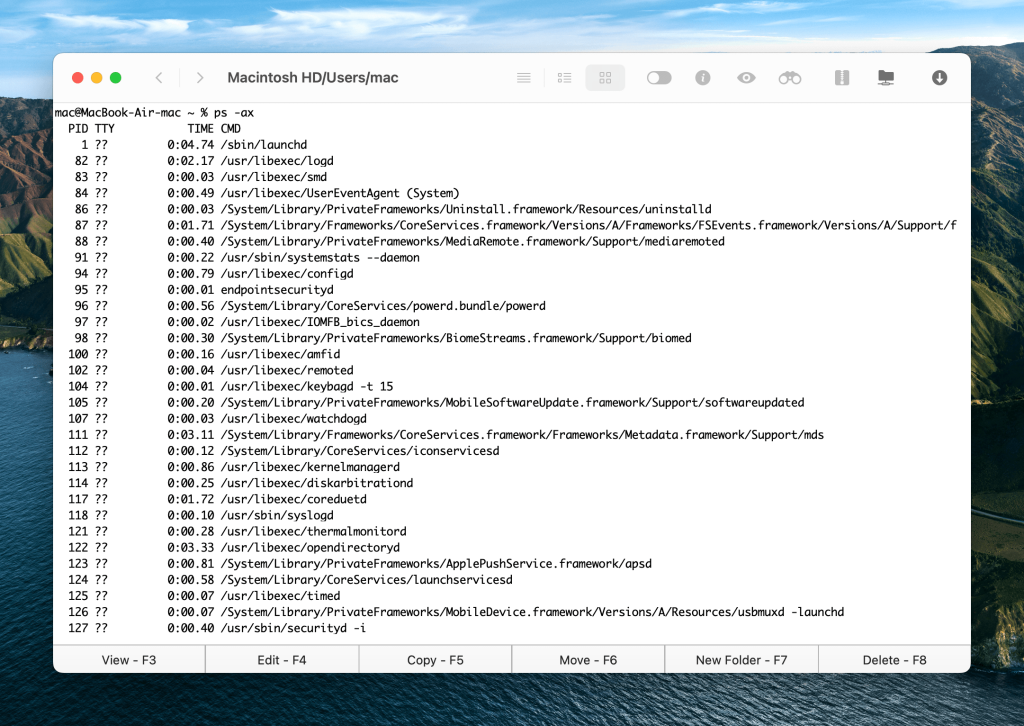
Once everything is done, you can return to the previous mode of Commander One by pressing the above-mentioned hotkey. The app has tons of other features that will surprise you, such as:
- Copying files
- Deleting files
- Compressing and uncompressing files
- Connecting to FTP servers
- Mounting popular cloud storages as local drives
- Mounting MTP and iOS devices
- Viewing processes in the system
The most remarkable feature which we believe is worth mentioning here is the lightning fast speed at which the app performs all these actions.
Conclusion
Remember that Terminal is not a completely safe thing. An inexperienced user can do some kind of trouble. Before executing any Mac Terminal commands, check your knowledge with the Geeks on the Internet, do not take on excessive risk. This advice also applies to courageous people who want to roll back the Mac OS update without having enough information about the procedure.
However, we hope that this article was rather informative for you and you found something interesting in it.
Frequently Asked Questions
-sudo updates your command as administrator (superuser) and requires a password. Be careful though, as incorrect commands can damage macOS and require a fresh install.
Basic Terminal commands are the following:
cat– list the contents of a file or folder;cd– like DOS, use this command to change directories;cp– copy a file or folder;defaults– this command changes the settings that are not specified in the settings;ls– this command lists the contents of the directory;mkdir– make a directory;mv– move a file or folder;nano– open the terminal editor;ssh– short for Secure Shell, this command creates a secure encrypted connection between two hosts;-sudo– updates your command as an administrator (superuser) and requires a password.
Be careful though, as incorrect commands can damage macOS and require a fresh install.
Many users are satisfied with the capabilities of the built-in Terminal app on Mac, while others want more. Luckily, there are many great alternatives out there. Commander One, in particular, stands out and we recommend giving it a try. It’s an excellent Mac Terminal replacement that has an impressive array of features.