Regardless of whether it’s your personal or professional data, it’s important to safeguard it and protect its confidentiality. This can be done by ‘locking’ your files using a password to limit access. There isn’t a straightforward way to password-protect ZIP file on Mac. You will either need to use Terminal or a third-party app.
Below, you’ll find detailed information on how to compress files with password on macOS via the built-in macOS utility – Terminal, and a special application – Commander One. Based on our own experience, we’ll explain the differences between the methods and provide step-by-step guides for their use so that you can secure your archived files and folders.
Encrypt a Zip file easily without Terminal
Despite being a native macOS program, the Terminal is suited for more tech-savvy users since it requires the memorization and manual entering of numerous commands. External apps, on the other hand, have a GUI (Graphical User Interface), which makes them a lot more intuitive and accessible when creating and managing encrypted archives.
Our recommended solution, Commander One, is an easy-to-use macOS application. It can create ZIP files and 7z with passwords, as well as copy, move, delete, edit, search, browse, and create new folders directly in an archive, etc.
How to ZIP and password-protect a file on Mac via Commander One
Here is how to enable Commander One’s archive protection:
Download the application from the official website, install it, and launch it.
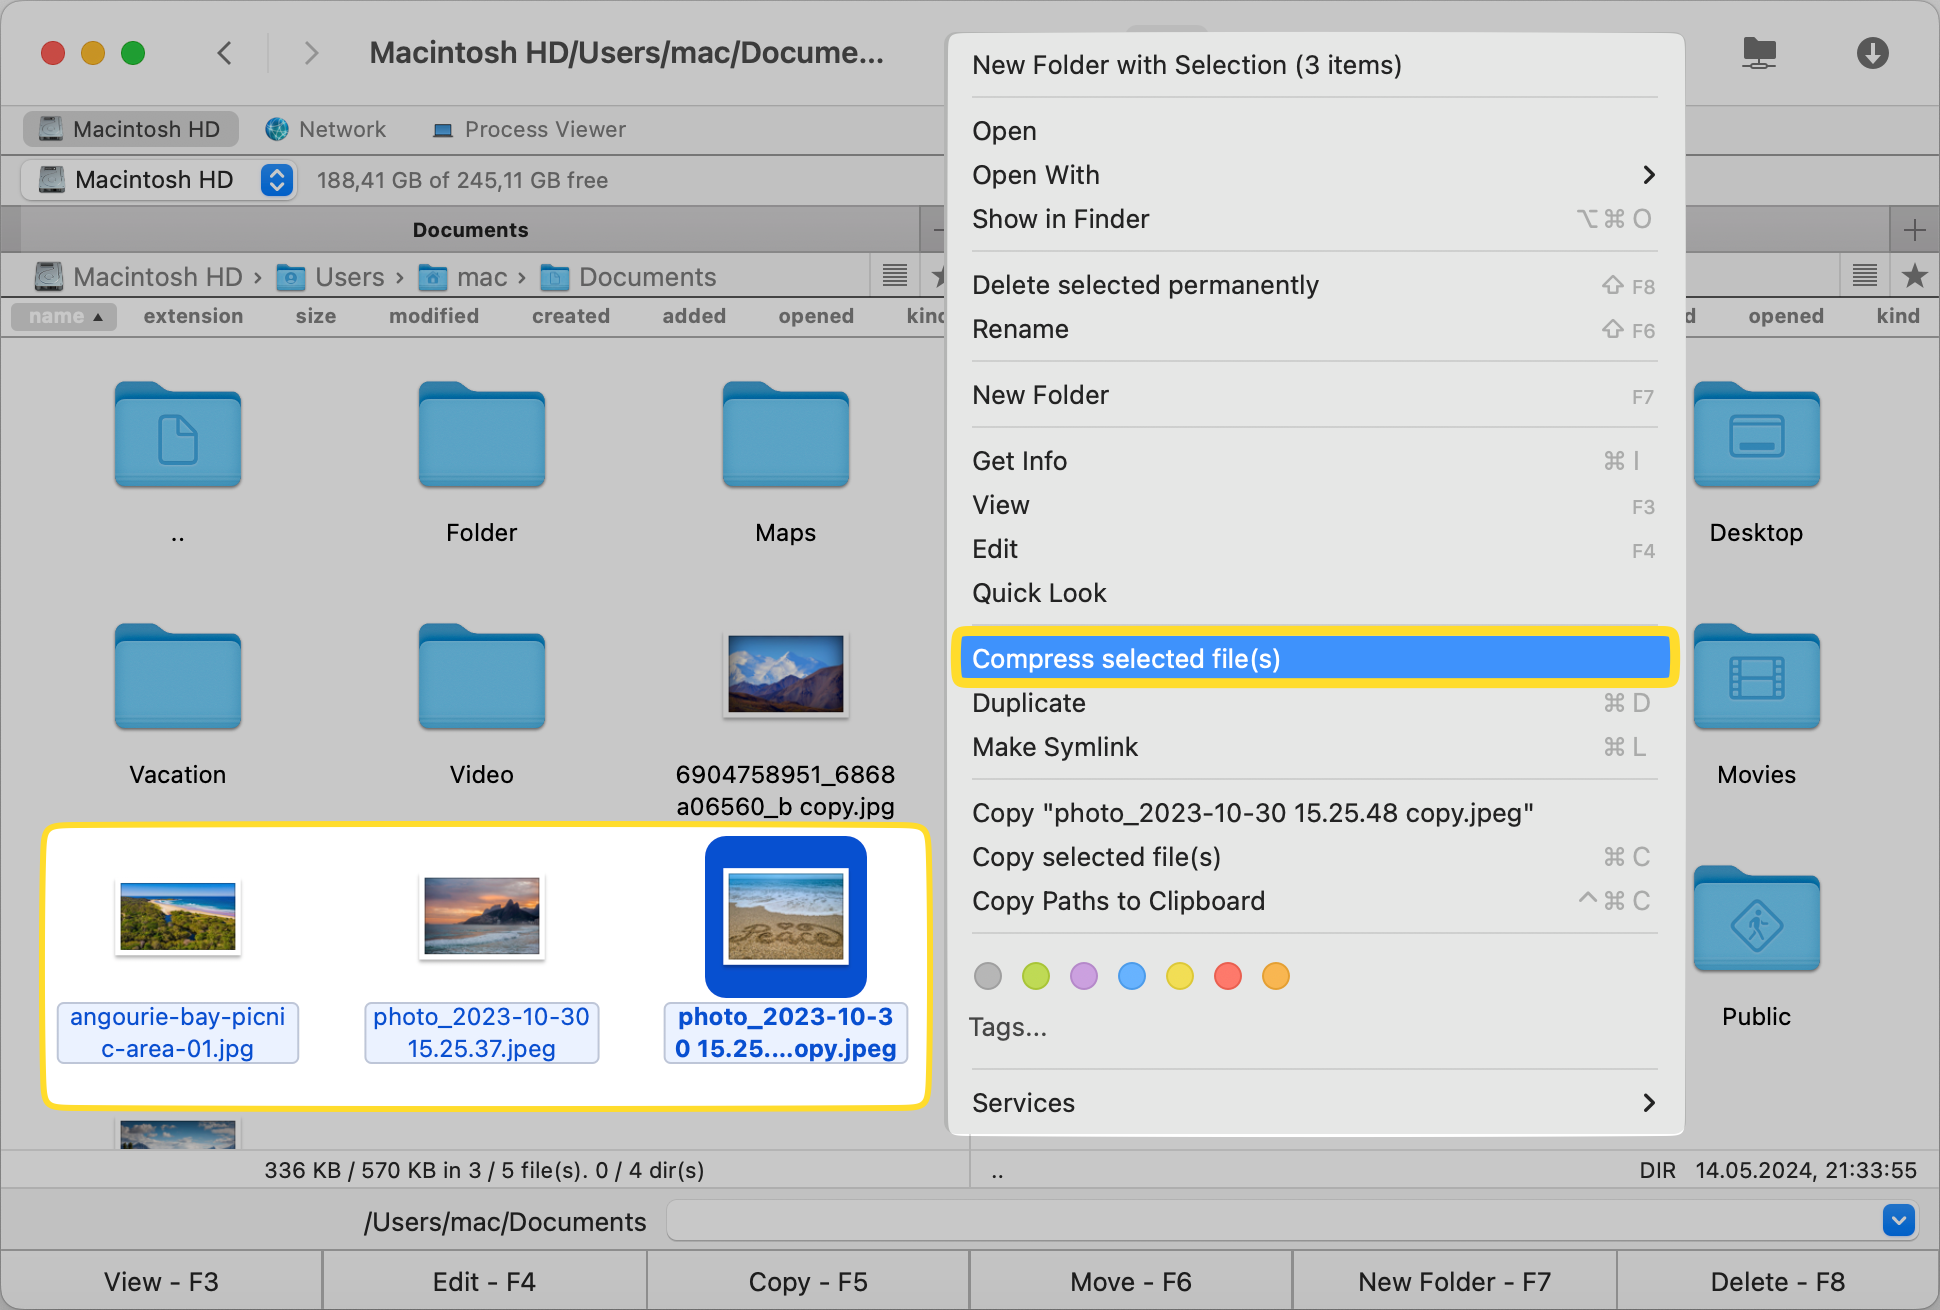
Navigate to the folder or file to compress into a ZIP file and right-click on it.
Choose ‘Compress selected file(s)’.
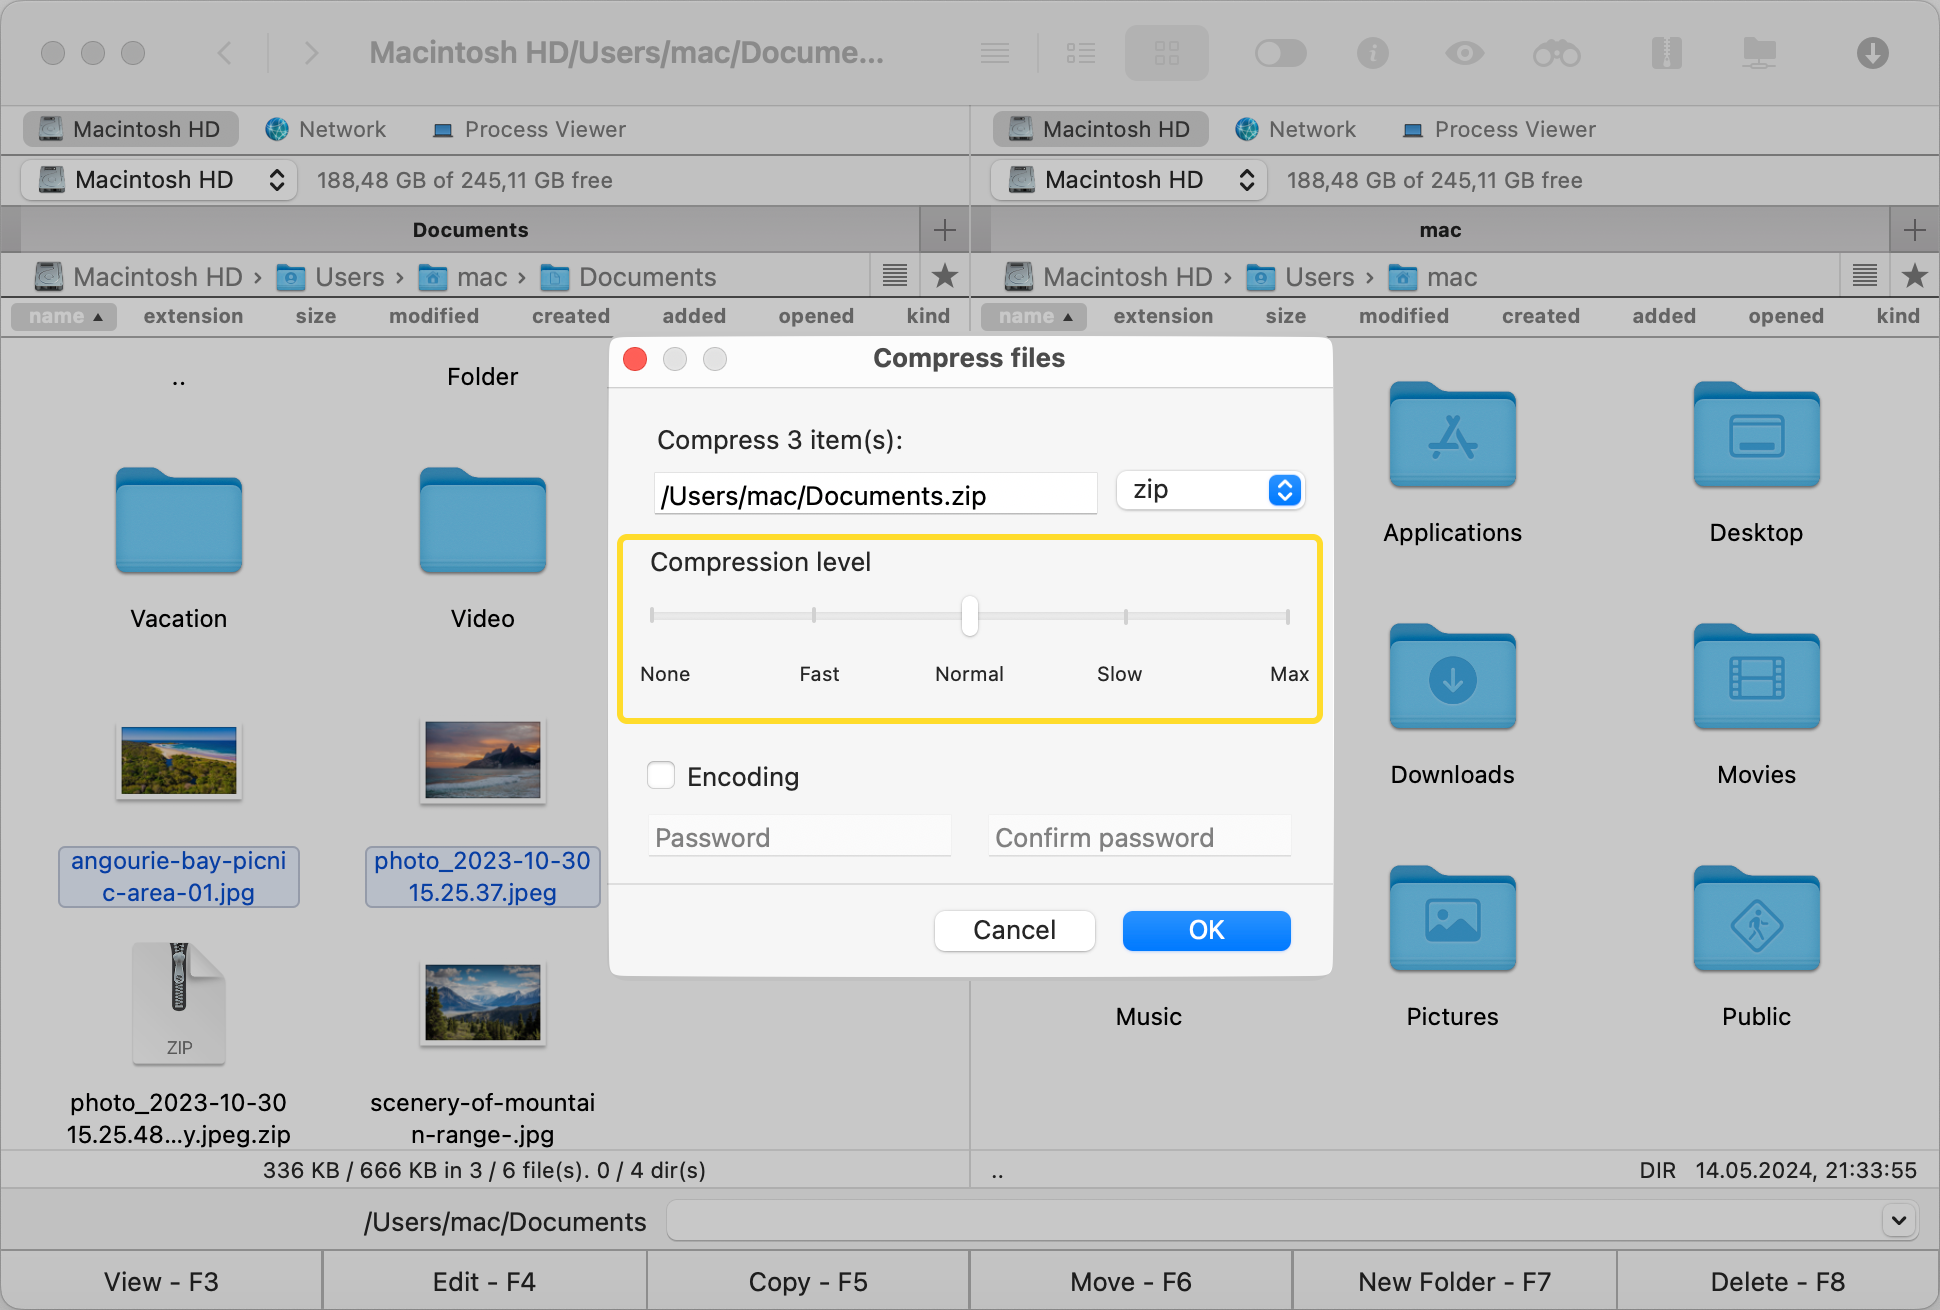
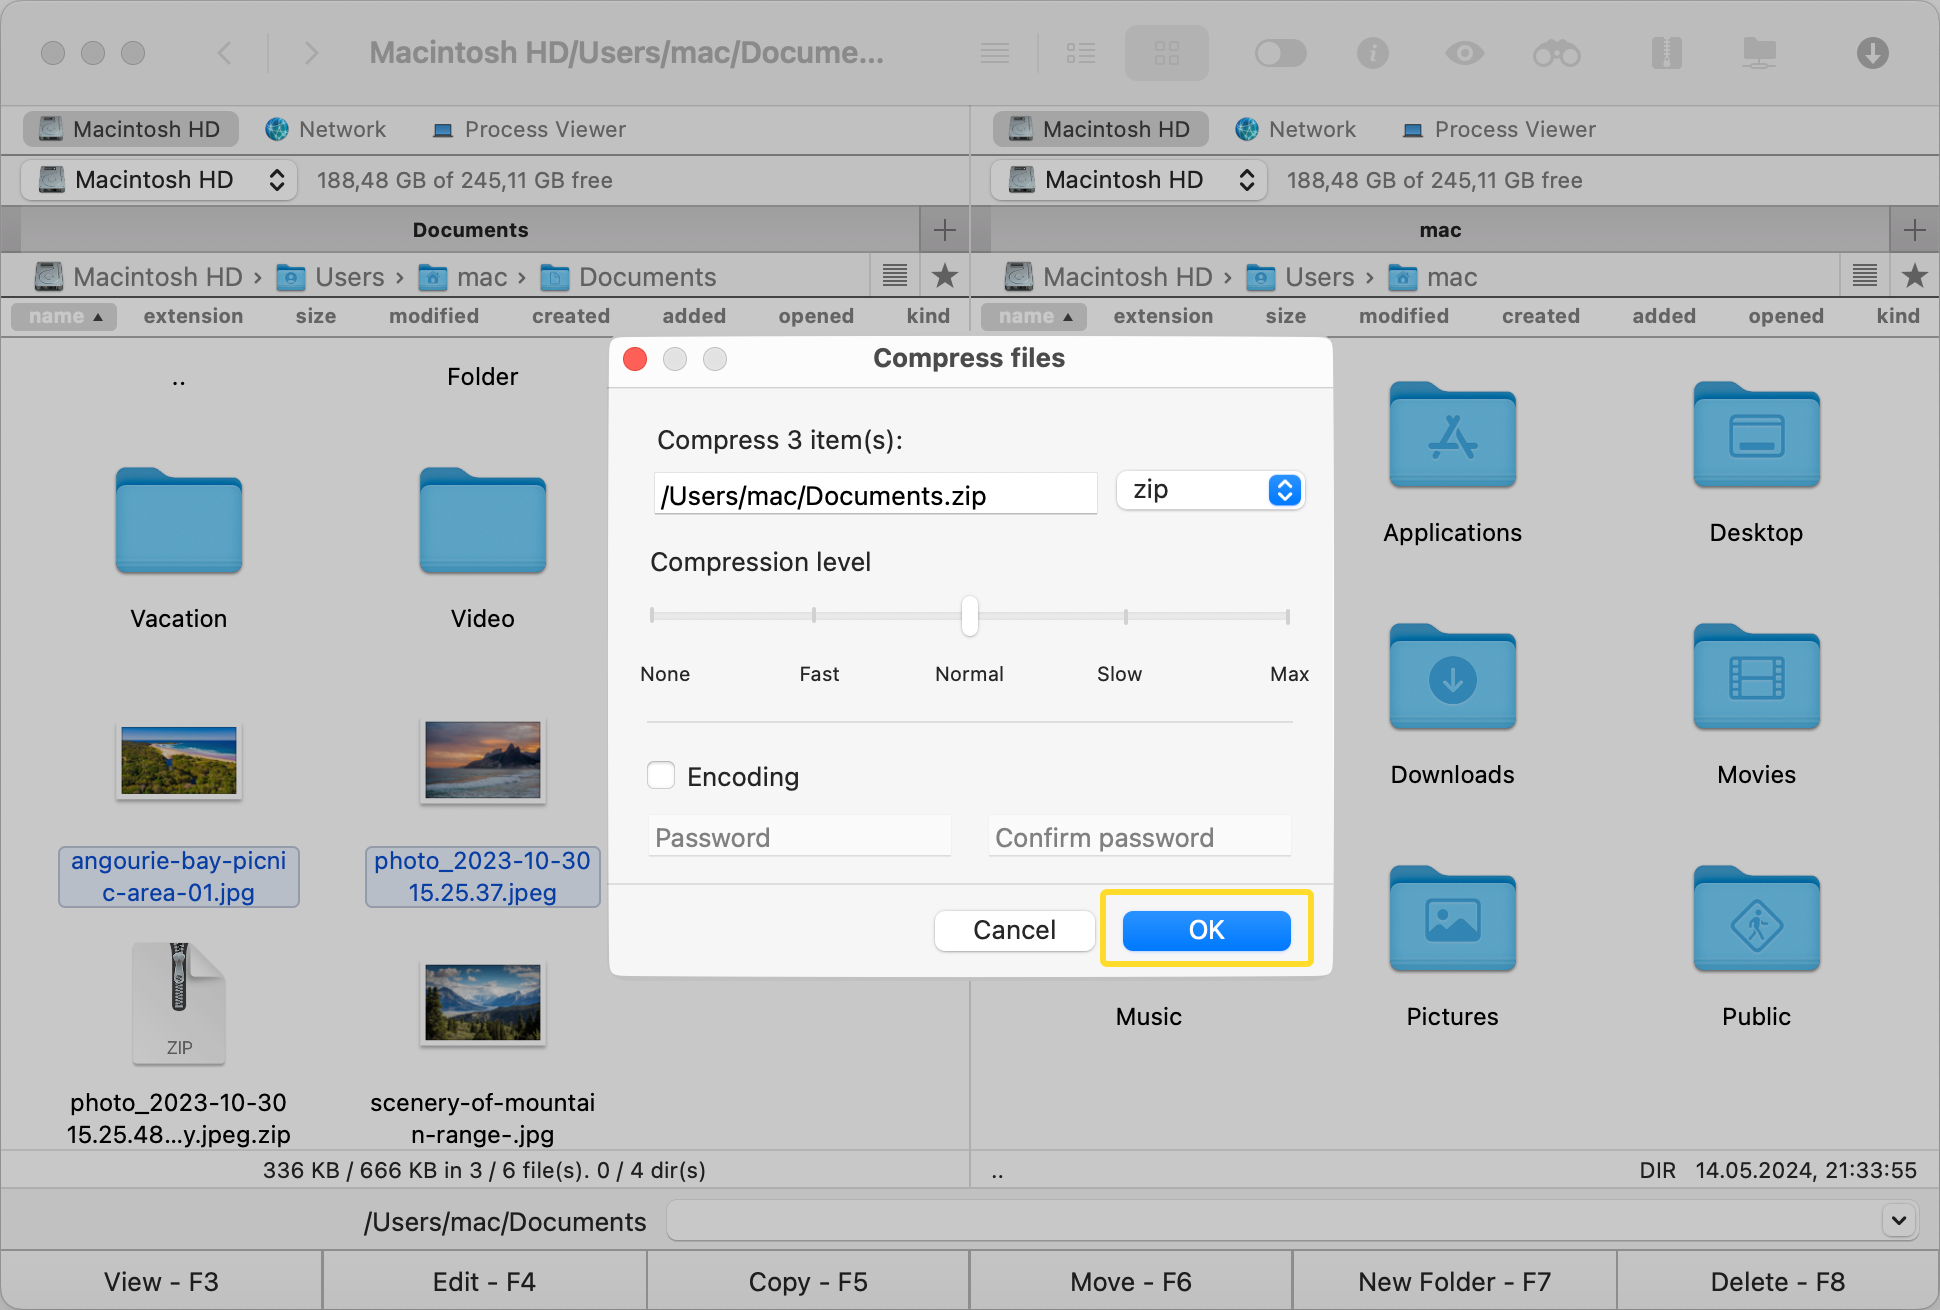
A box will appear containing different properties.
Set the desired internal compression by moving the ‘Internal compression’ slider.
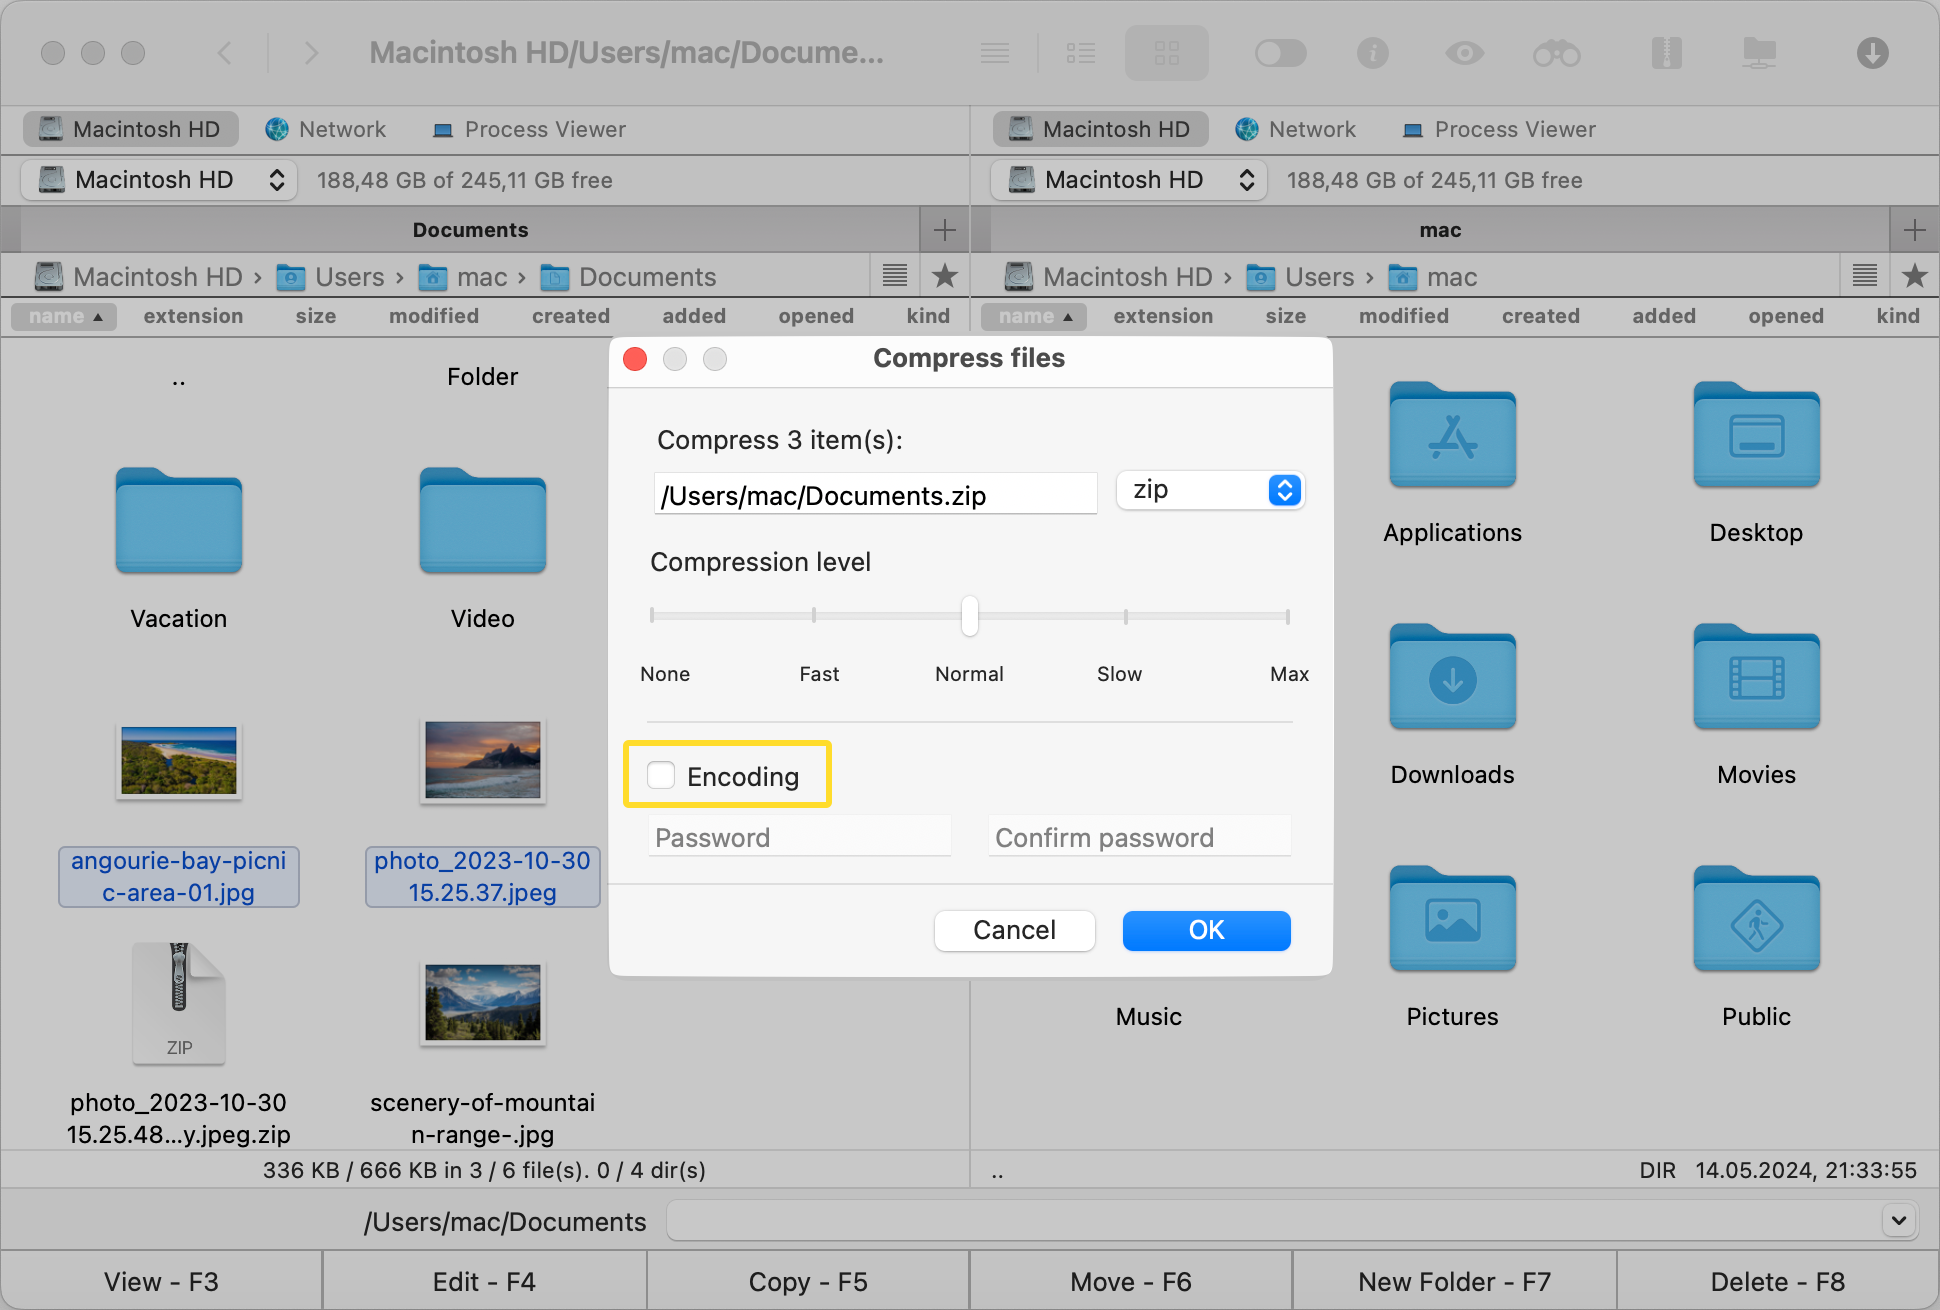
To protect the ZIP file with a password, check the ‘Encoding’ check box.
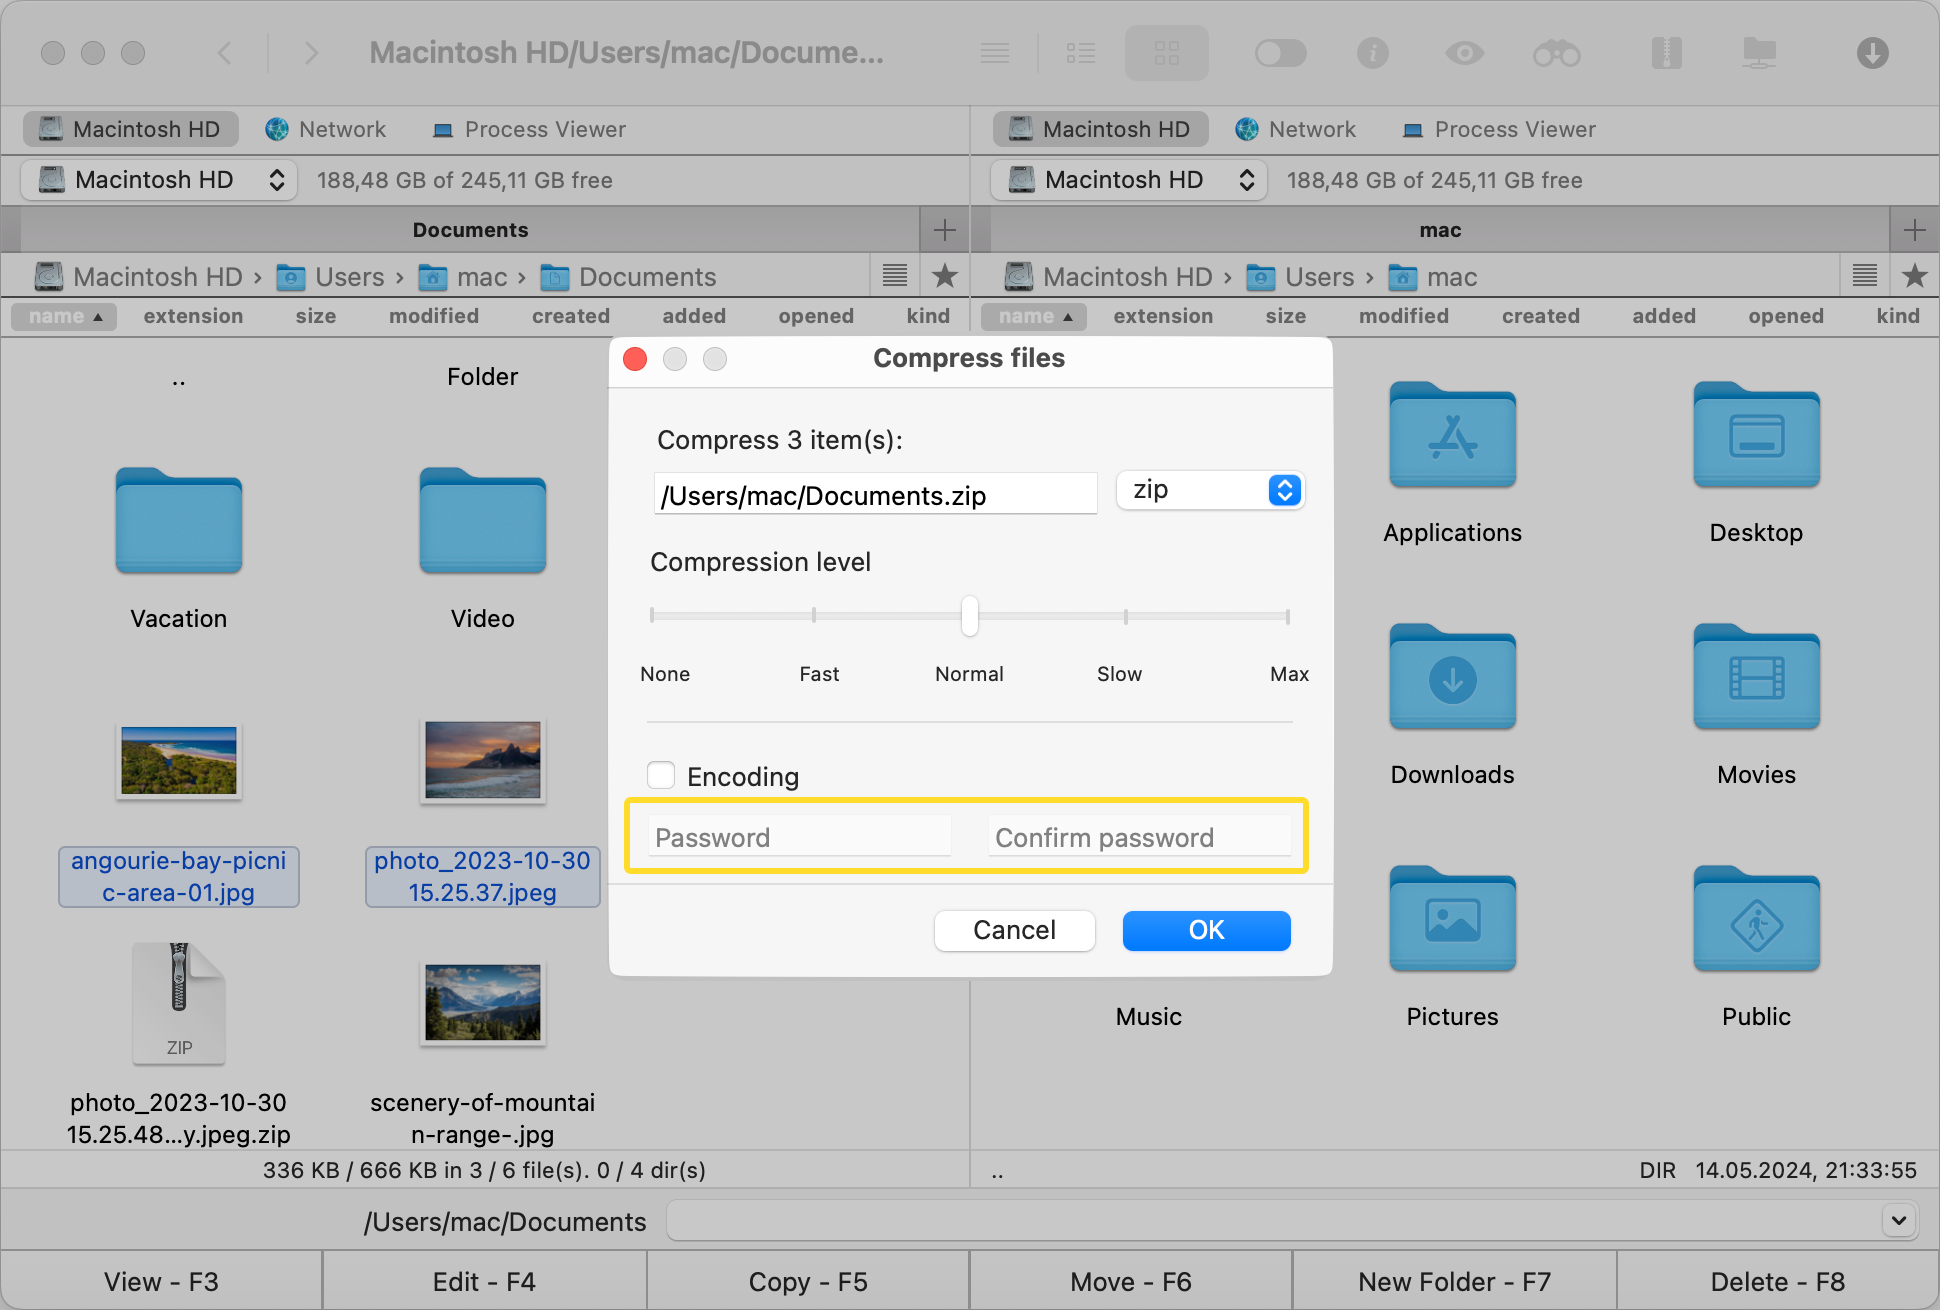
Enter your desired password in the ‘Password’ field, then re-type it in the ‘Confirm password’ field.
Click ‘OK’ to create your archive.
How to open a password-protected archive on Mac
To decrypt and access your archive, follow the steps below:
Open the Commander One application.
Locate the file you’d like to open.
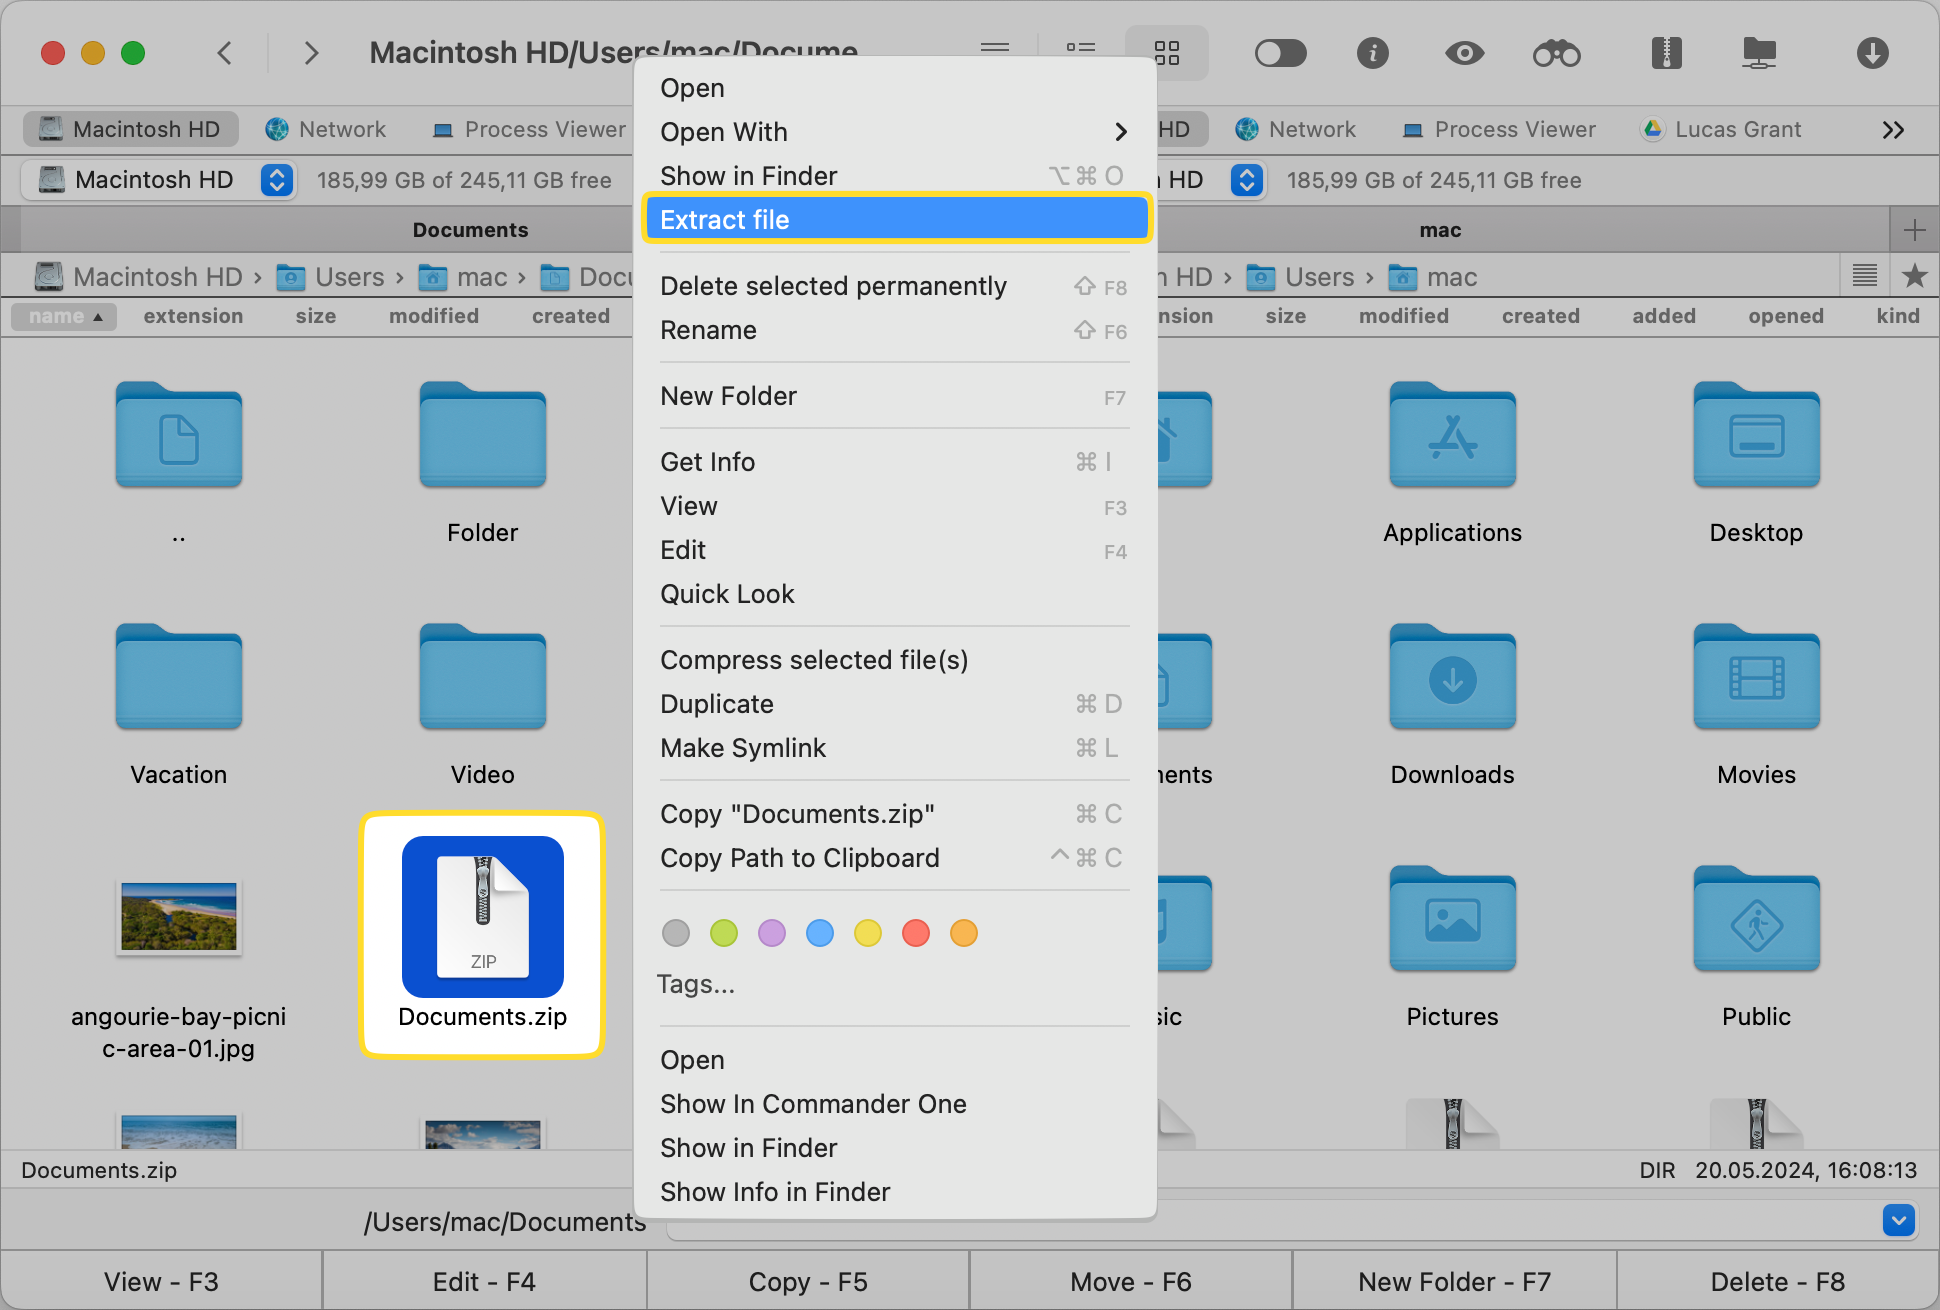
Right-click on the file and Extract file
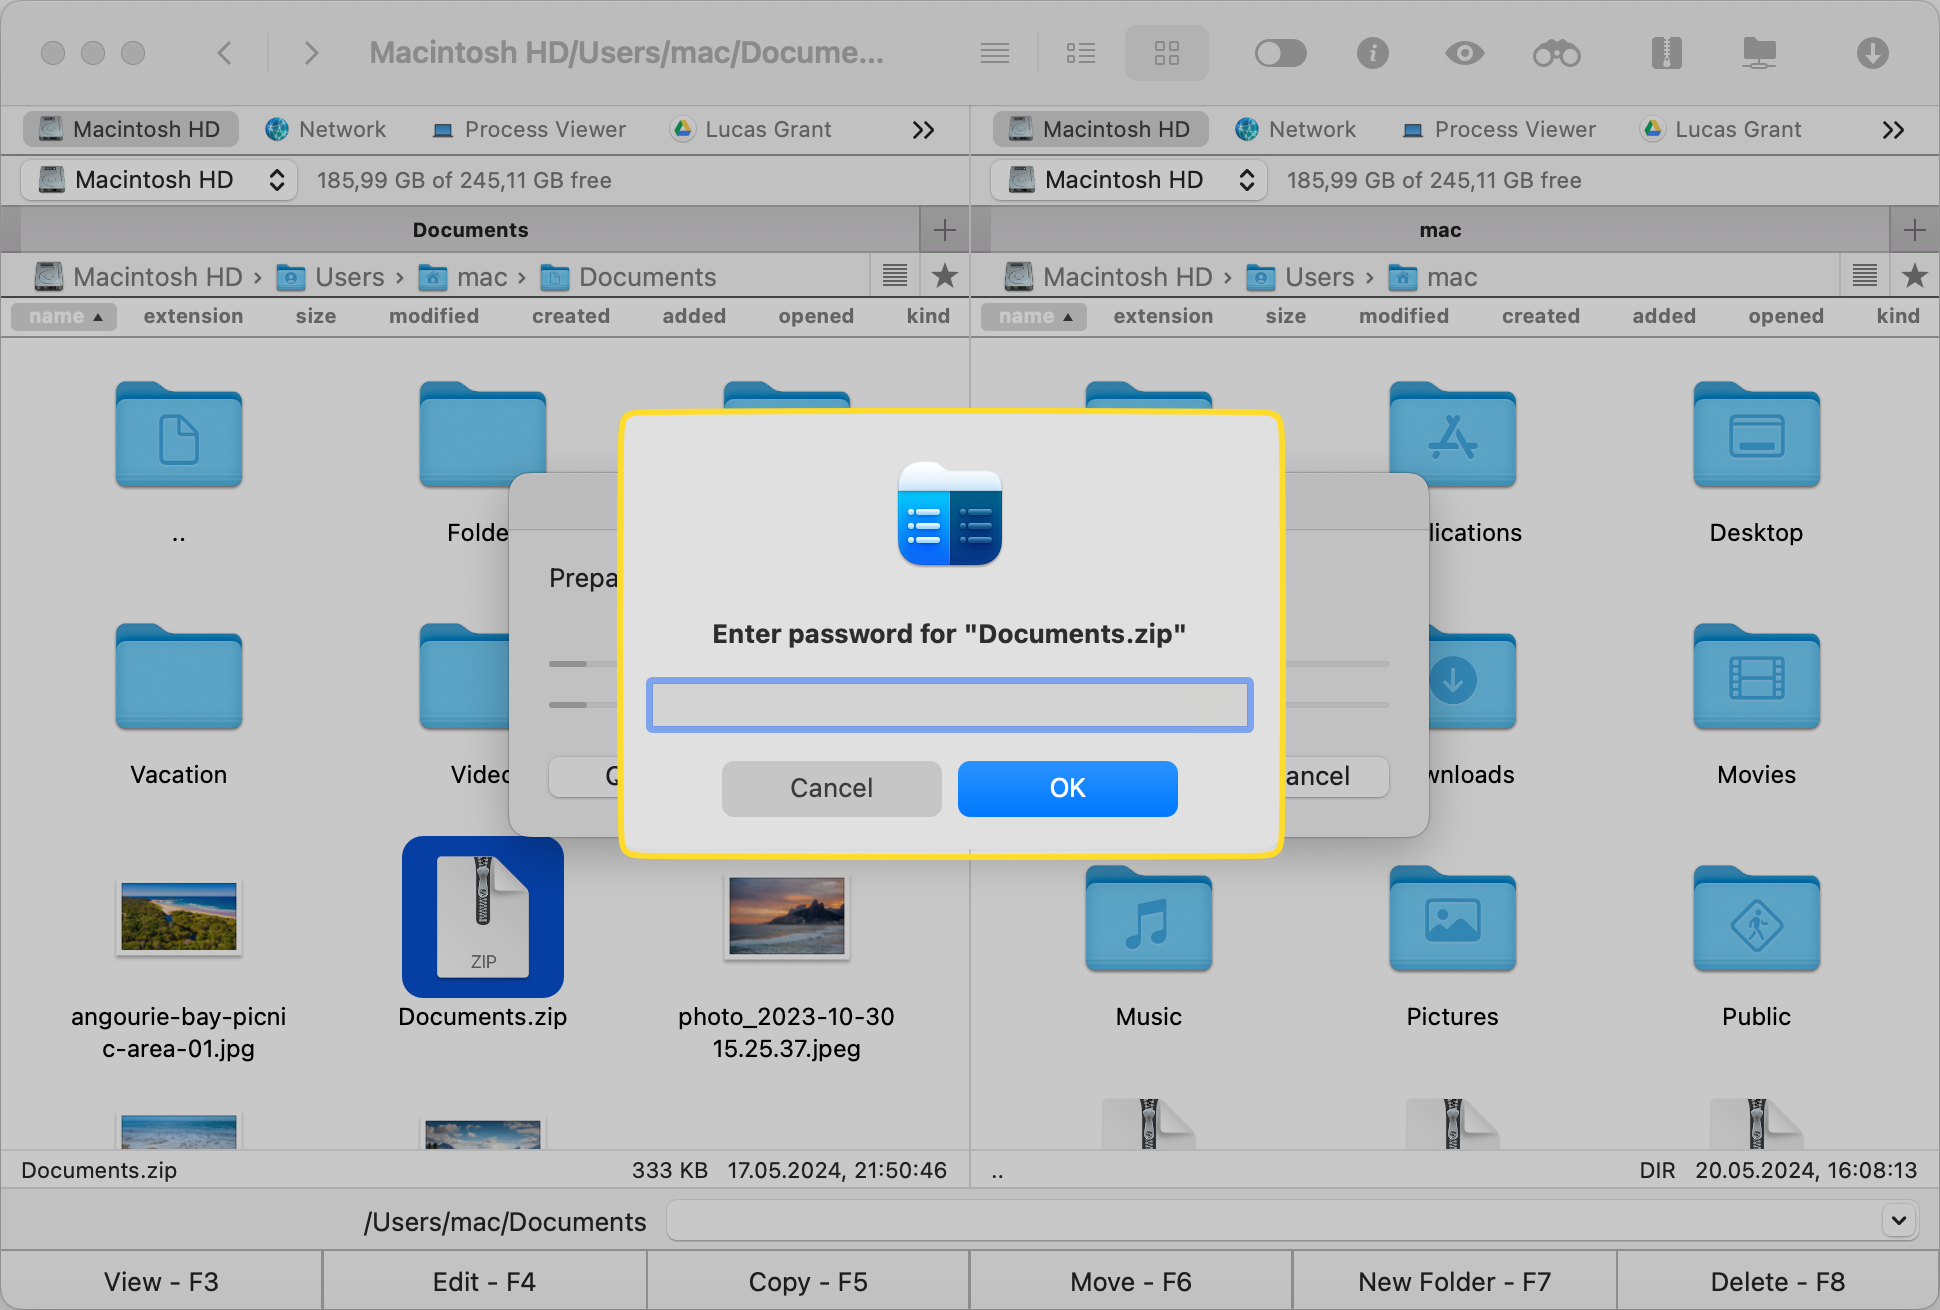
Enter your password.
Setting a password for a ZIP archive on Mac via Terminal
The Terminal is the only native way to compress files with a password on macOS. Mac’s Archive Utility doesn’t allow passwords for ZIP files, so it cannot fulfill this purpose.
Complete the following steps:
Open the Terminal application by going to the Utilities folder or performing a Spotlight search.
Enter the command zip -er archive_name.zip folder_to_compress, replacing archive_name with your desired zip file name and folder_to_compress with the directory you wish to protect.
You will be asked to set a password for the ZIP archive. You need to enter and then re-enter to verify it.
Commander One’s Mac Terminal feature
Commander One can act as a good replacement app for the Mac Terminal. As a Mac Terminal Emulator, it allows you to execute commands right from its interface, access FTP, and more so that you can conveniently manage all your files and system processes.
Note
For a password to actually protect the privacy and security of data, it must be difficult to guess and hack. Make sure you set strong passwords for files or folders, fulfilling as many of the requirements listed below as possible:
- Make it long (at least 8 characters)
- use uppercase and lowercase letters
- Add numbers, special symbols, and punctuation marks such as “#,” “%,” “@,” “*” and “!”
- Don’t use personal information
- Use different passwords for different things instead of reusing the same ones
- Try to make your password memorable for yourself by using something you’re familiar with but playing with spelling (e.g. replacing one letter with another)
- Change your passwords regularly to avoid issues if you fall victim to a data leak, for example.
Conclusion
In today’s world, it’s paramount to protect files securely. This requires technical know-how and a solid data management routine.
Whether you’re using macOS’s built-in Terminal application, special software like Commander One, or a different encryption tool to password-protect an archive, never underestimate online threats. Choose the method that works best for you and apply good practices in your daily life and work to safeguard your private data.
Frequently Asked Questions
Always store your password in a secure location or in a password manager. Without it, you won’t be able to access your encrypted file.
To check if your file is secure, try to open it. If it asks for a password and doesn’t let you access it without the correct combination, then you’ve successfully created a secure file.
Yes, you can use Terminal commands or downloadable software to set a password for such a zip file.
No, you can’t add a password to an existing file. You need to decompress it first, then re-compress it by enabling end-to-end encryption via Terminal or specific software.