In this article, we will talk about the WebDAV protocol and how to use it. Besides that, we’ll discuss how you can improve the WebDAV experience by using a third-party application such as Commander One, which provides a user-friendly interface and additional features to manage files on your server efficiently.
What is WebDAV
WebDAV is a set of extensions and additions to the Hypertext Transfer Protocol (HTTP), described in RFC 4918. The main advantage of the WebDAV protocol is that, with its help, you can access files from any device, be it a computer, tablet, or smartphone, with Internet access without being limited by local storage. In other words, you can always access your files, even if you are away from your workplace.
By providing remote access to data in a central location, WebDAV does not require files to be copied to the user’s local computer and then copied back. As a result, we get something very similar to FTP, or even a network file system like NFS or Samba.
What does WebDAV offer?
Convenient collaboration on files: WebDAV allows several users to work with the same file, edit it, and save changes.
Easy updating and synchronization of data: You can update files and folders on a remote server while saving local changes. Data synchronization between devices occurs automatically.
Configurable access rights: You can manage access rights to files and folders, making them available only to a certain user or group.
Ease of use: WebDAV can be configured and used on almost any device: computer (Windows, macOS, Linux), tablet, or smartphone (iOS, Android).
Data backup and recovery: You can create backup copies of files and folders on a remote server.
File version control: WebDAV supports version control functionality that allows you to track and restore previous versions of files.
Overall, WebDAV provides a convenient and reliable way to access files over the Internet, allowing them to be easily edited, shared, and collaborated on. This is especially useful for remote or distributed teams that need to share information and collaborate on editing files in real-time. Now that you know what WebDAV is used for, let’s learn how to use it on a Mac.
Connect to WebDAV server on Mac
macOS has built-in support for WebDAV. To connect to a remote server, you need to proceed with the following guide:
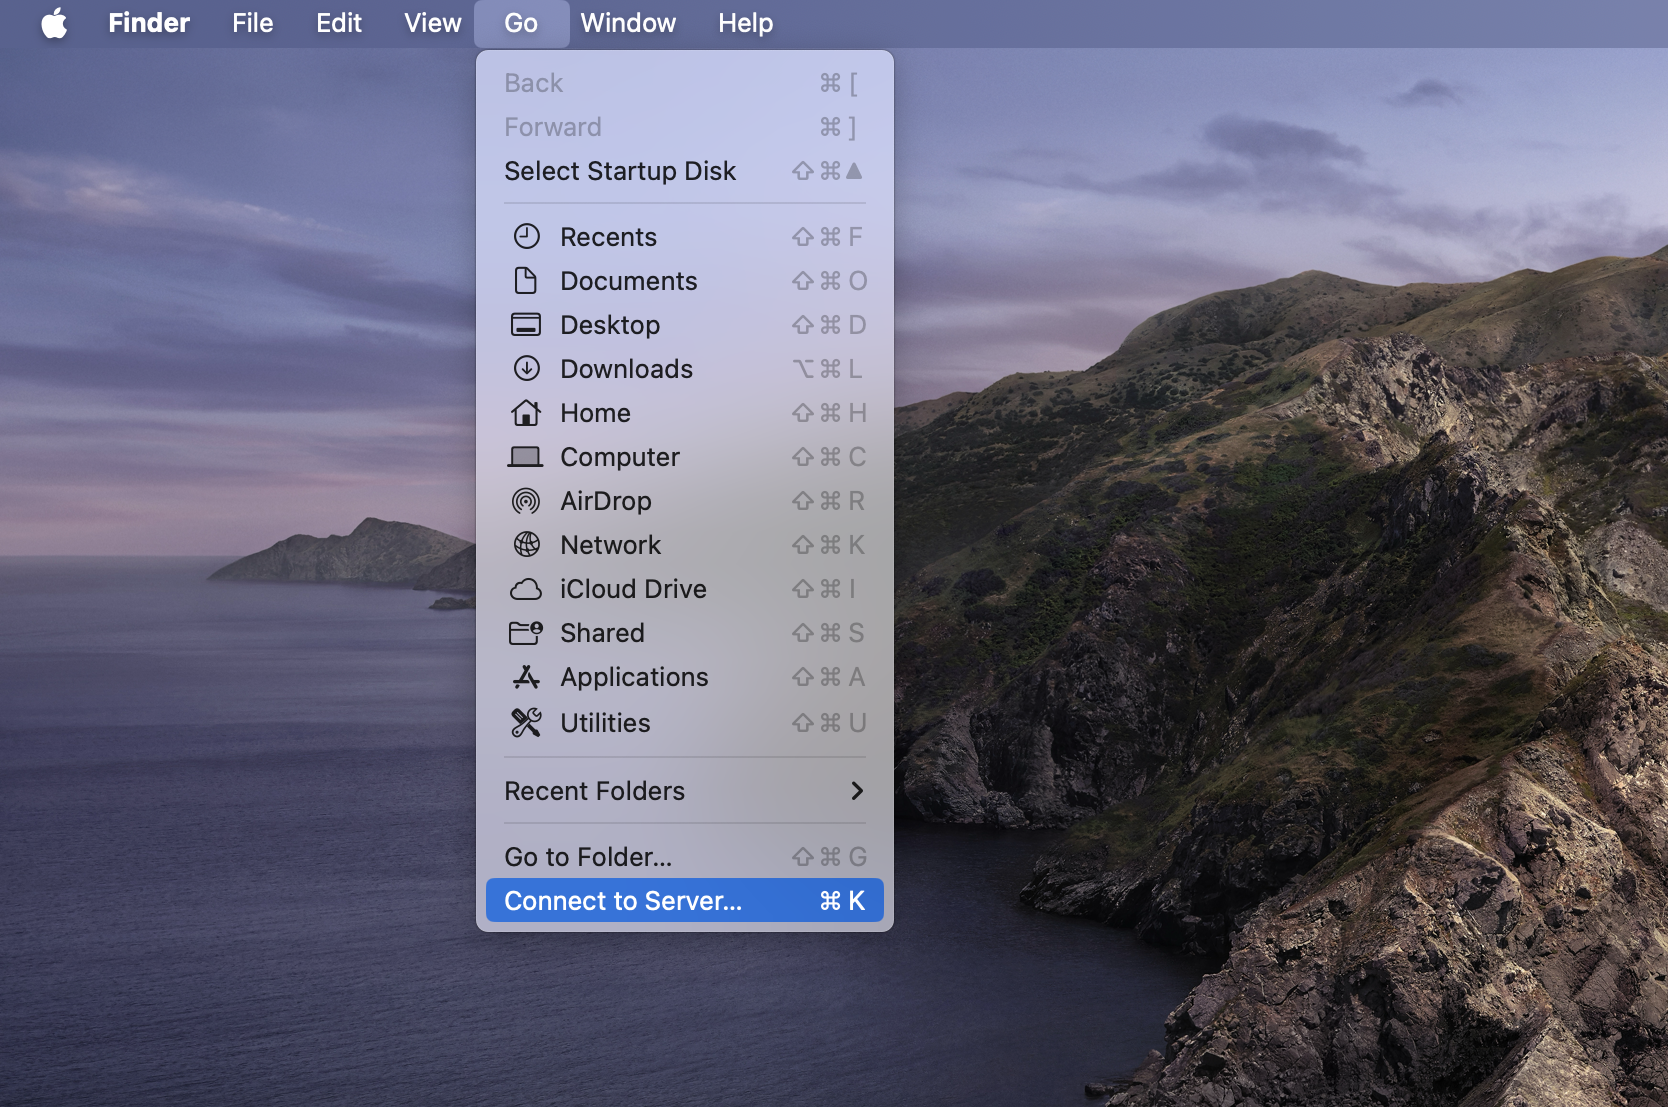
Open Finder, select “Go” in the menu, and then choose the “Connect to Server” option.

In the window that appears, you need to enter the URL of the WebDAV server. The WebDAV URL syntax can vary. Some variations of the URL include:
- Standard URL: http://hostname/path
- HTTPS URL: https://hostname/path
- IP address: http://IP address/path
- With port number: http://hostname or IP address:8080/path
Once connected, you’ll see the contents of the WebDAV server. You can now browse, open, edit, save, and copy files directly from Finder.
How to use WebDAV on Mac with Commander One
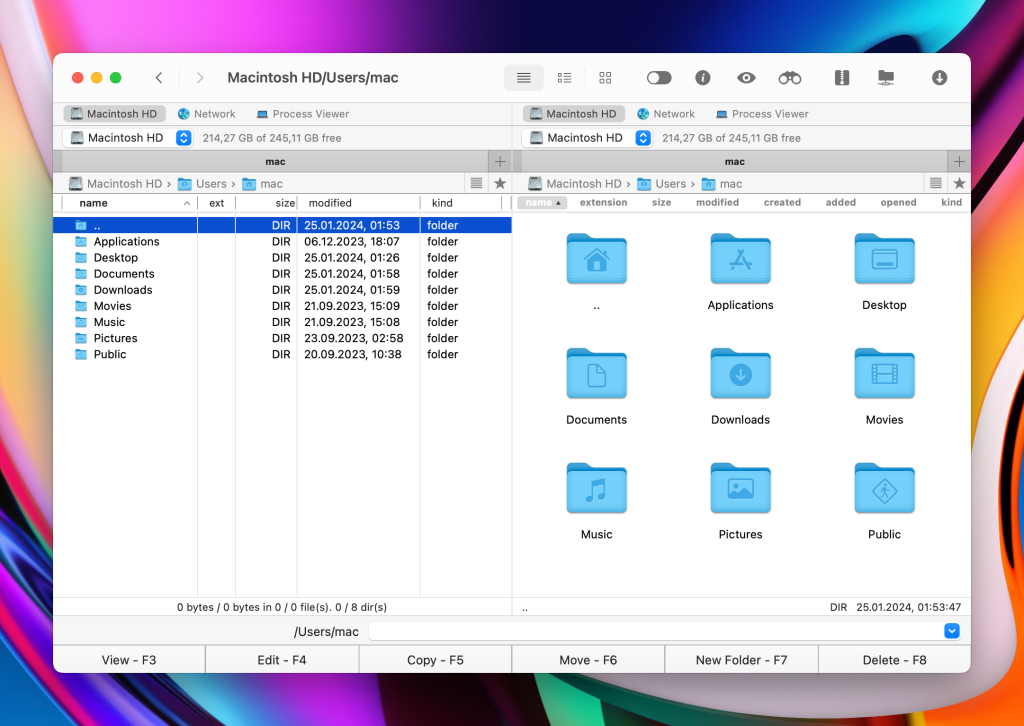
As a decent alternative to Finder, we recommend using Commander One. The application serves as a file manager and a WebDAV client for Mac, which greatly simplifies the experience of managing files on remote servers. Once connected, you can manage your files through an intuitive two-pane interface, making your file management process more convenient and efficient.
Besides that, this software offers a variety of useful and advanced features. Here you can find seamless support for almost all cloud storages (Google Drive, Amazon S3, Dropbox, OneDrive, etc.), the ability to work with Android, MTP, and iOS devices, Terminal emulator, advanced search, the ability to show hidden files, and the ability to work with a huge number of the supported archive formats.
Overall, Commander One offers convenient file management, with the ability to archive files and send them to the remote server, copy files right from the cloud, and upload files to any cloud storage or remote server right from the app’s interface with no need to use additional software.

How to connect to WebDAV server
Get started with Commander One by downloading, installing, and launching it.
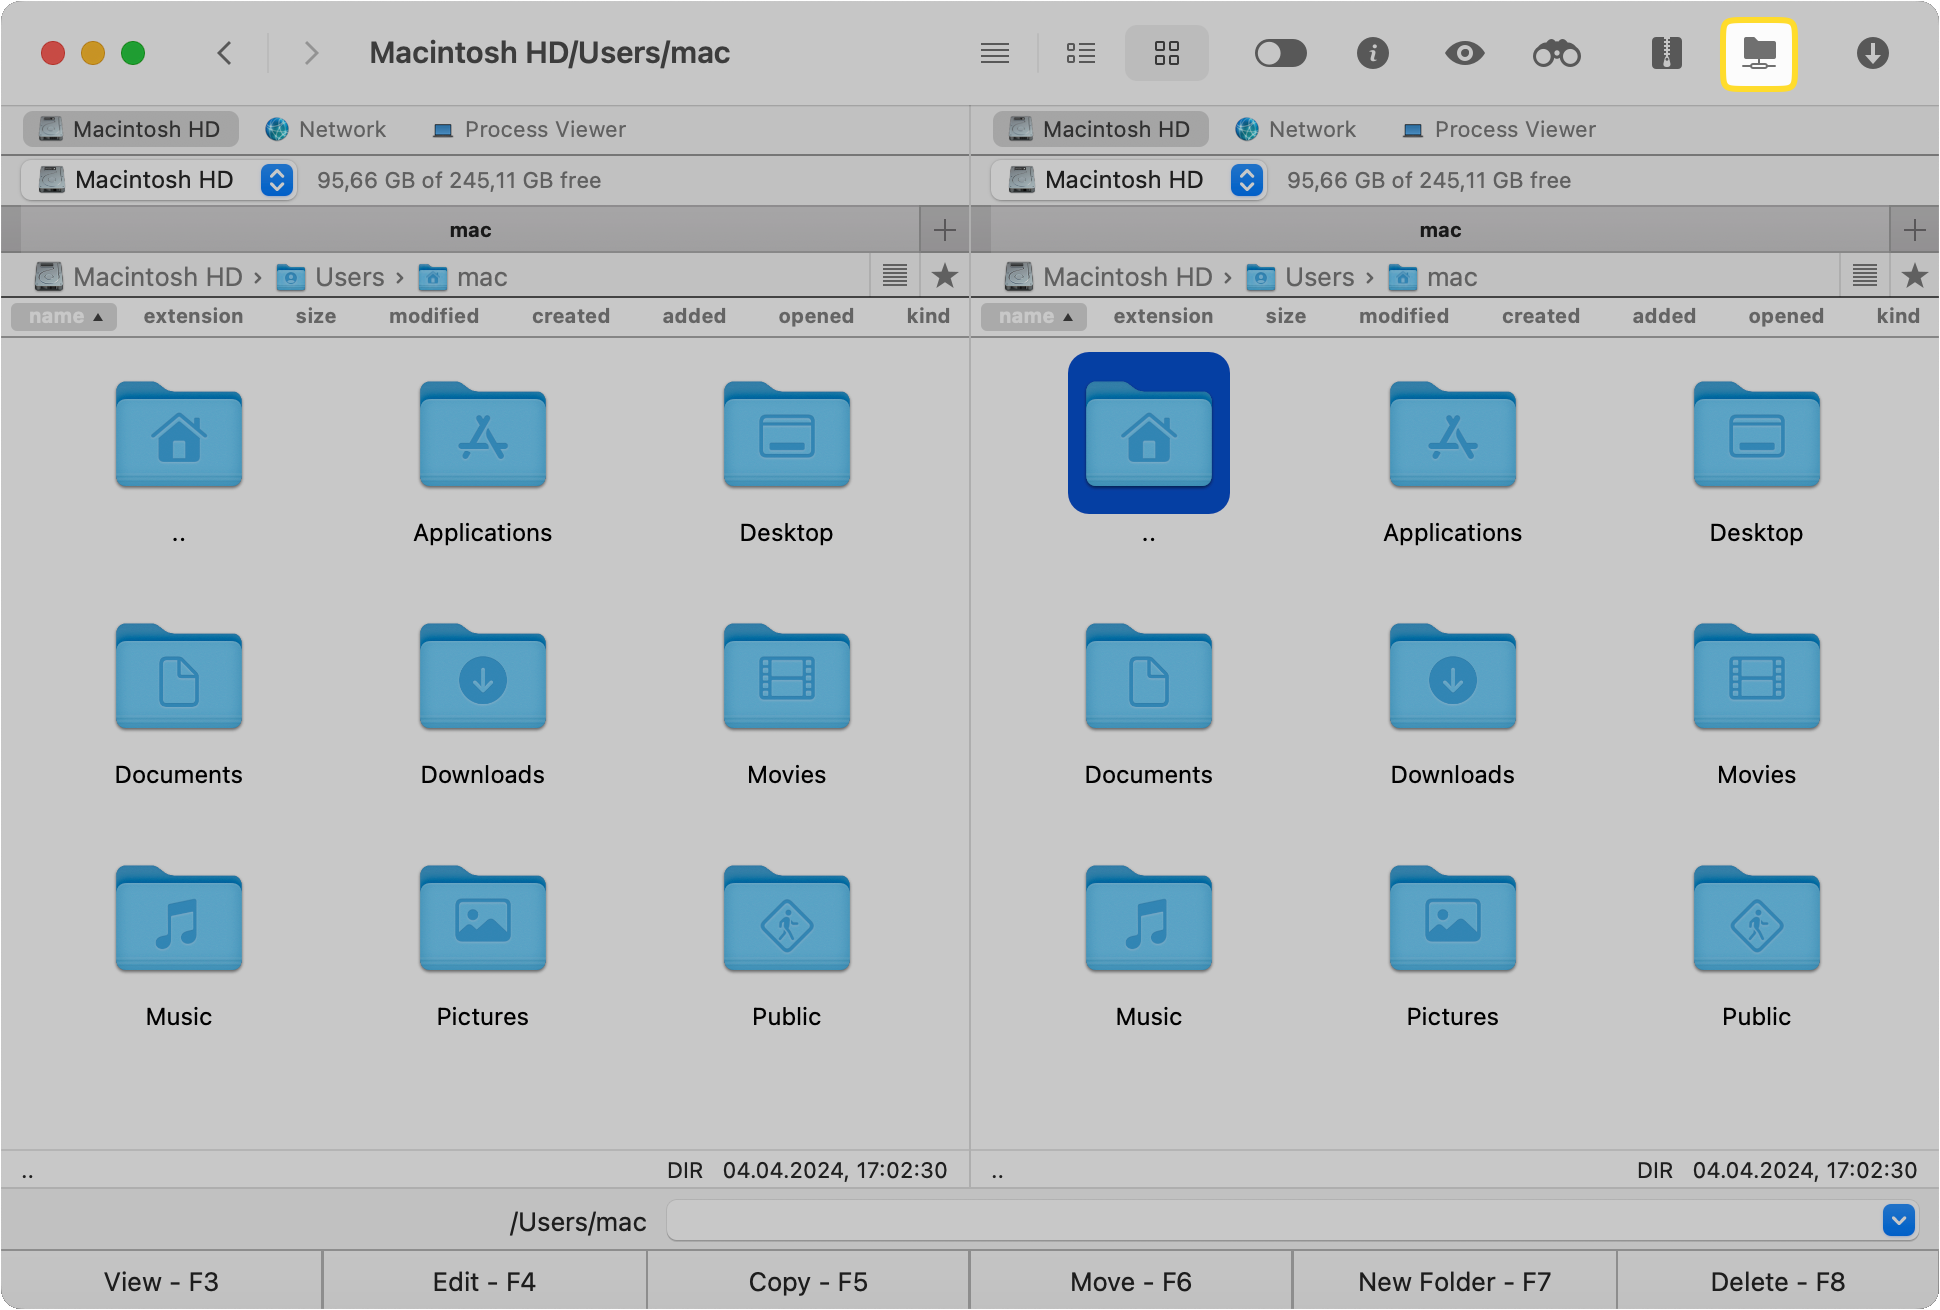
Go to “Connections Manager” by using either the Command+F shortcut or the corresponding icon on the toolbar.

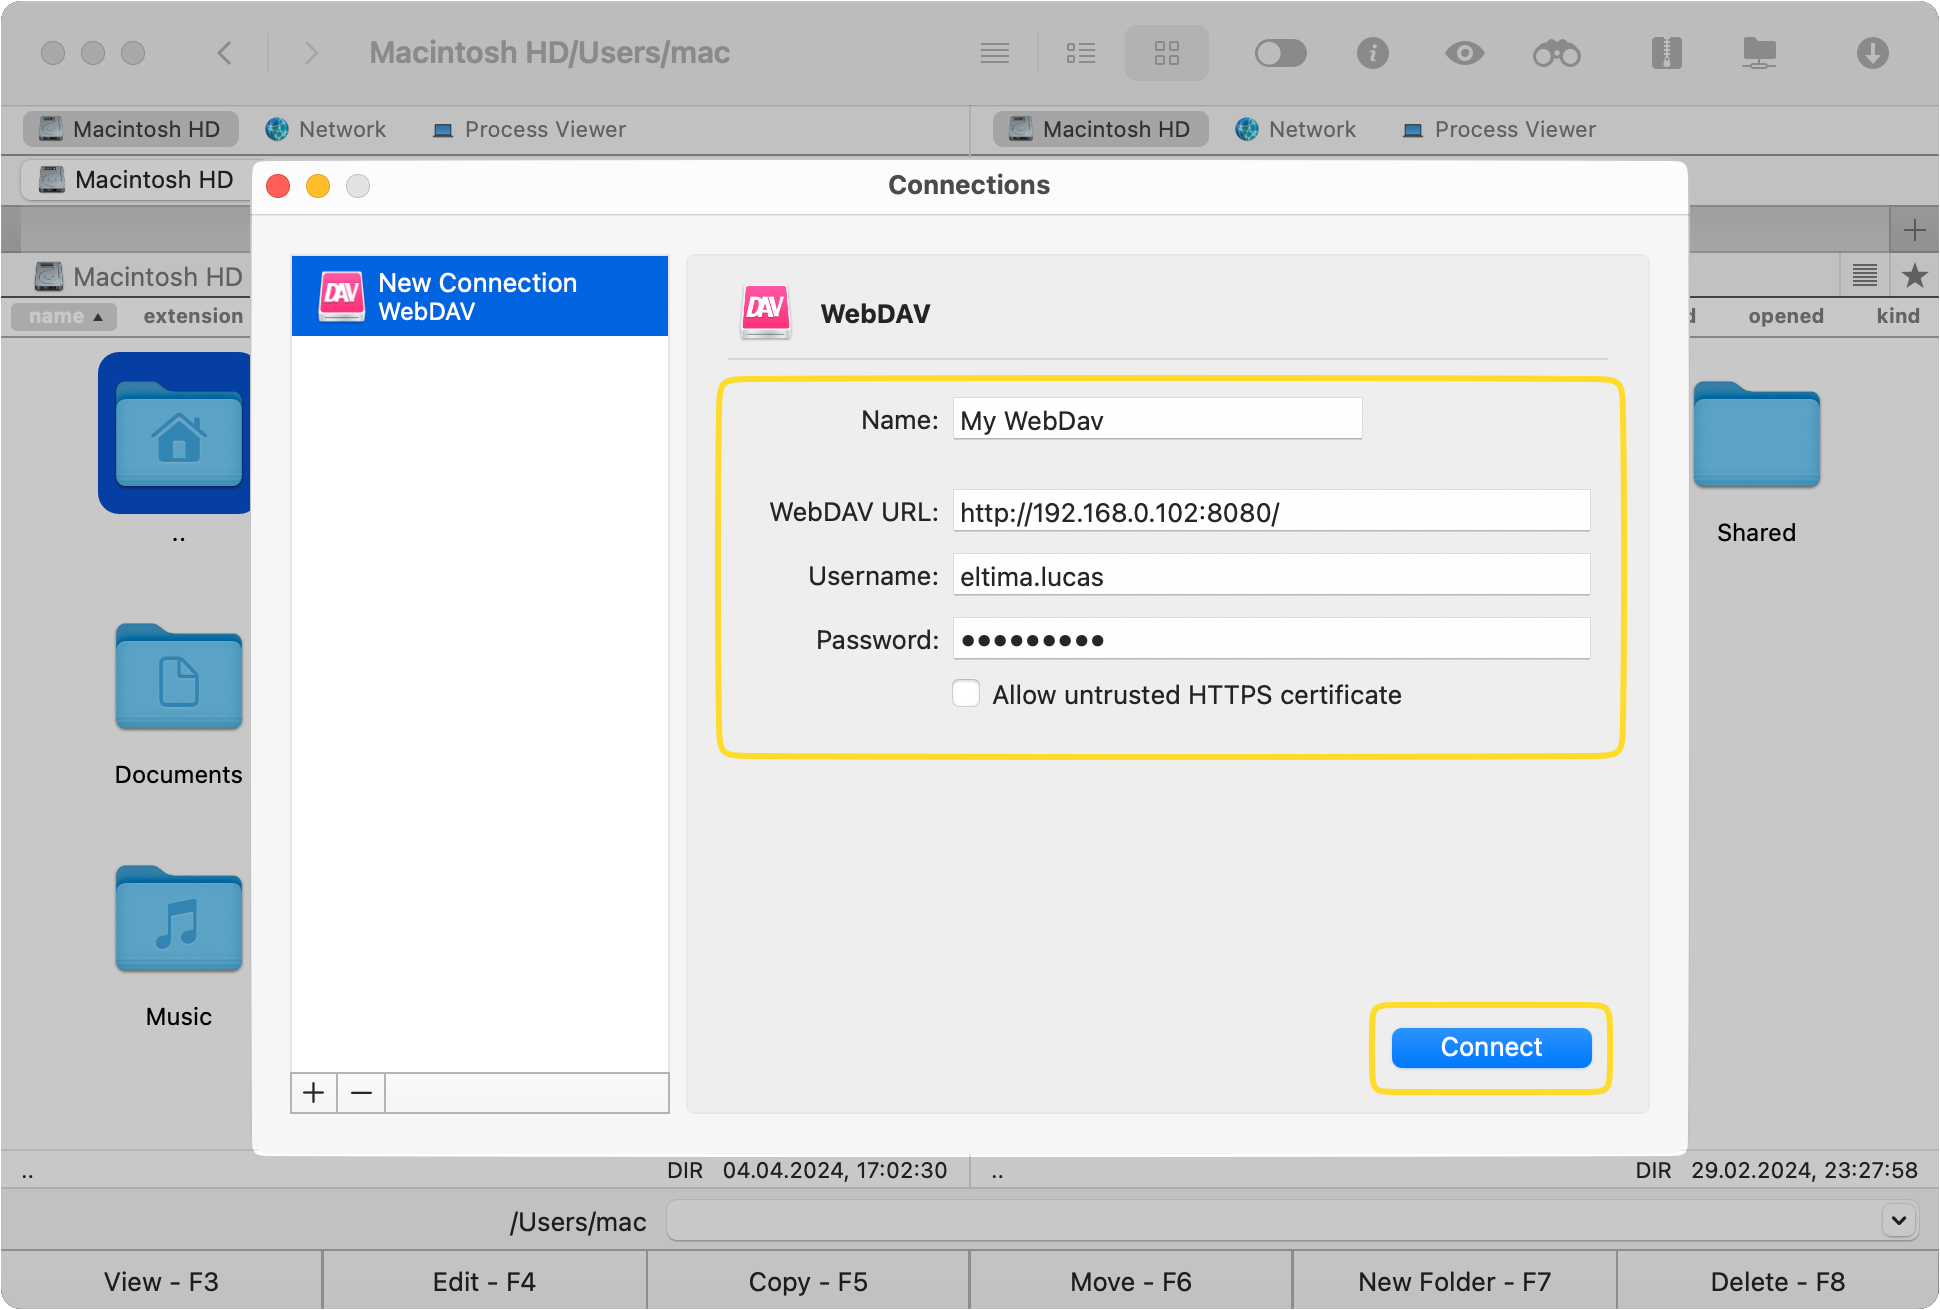
Click the WebDAV icon and continue setting up the server. Fill in the required fields: address of the server, login information, and password.

That’s it! Now you can navigate, manage, and upload files to the server.
Conclusion
WebDAV is a robust protocol that allows a web server to act as a file server and support collaborative content creation on the Internet. Although it is sometimes described as outdated, there are lots of people using it. Knowing how to use WebDAV more conveniently can be a great plus and save time. In this case, we recommend using Commander One.
This dual-panel file manager can be called the best WebDAV client Mac solution as it facilitates the process of managing files on remote servers, offers advanced features for file management, and is a top choice for admins and developers who want more from their file manager.
Frequently Asked Questions
Support for WebDAV has been available in the pCloud Premium plan since February 11, 2022. Unfortunately, the free plan doesn’t include this feature. However, if you are not a Premium user and need to perform file sharing between pCloud and WebDAV servers, you can rely on Commander One.
With its help, you can simplify file transfer and management tasks, making it an ideal solution for users looking to integrate pCloud with WebDAV servers.
The protocol itself doesn’t provide security features like encryption. However, it can be used over HTTPS. Besides that, WebDAV supports various authentication methods, such as Basic Authentication, Digest Authentication, etc. In addition to authentication, it provides the ability to control access to files and folders on the server.
Besides WebDAV, there are several alternatives for file sharing:
- FTP (File Transfer Protocol): This is one of the oldest methods of transferring files over the network. More information about FTP can be found on our blog.
- SFTP (SSH File Transfer Protocol): Similar to FTP but with additional layers of security.
- Cloud storage: Services such as Google Drive, Dropbox, Box, etc.